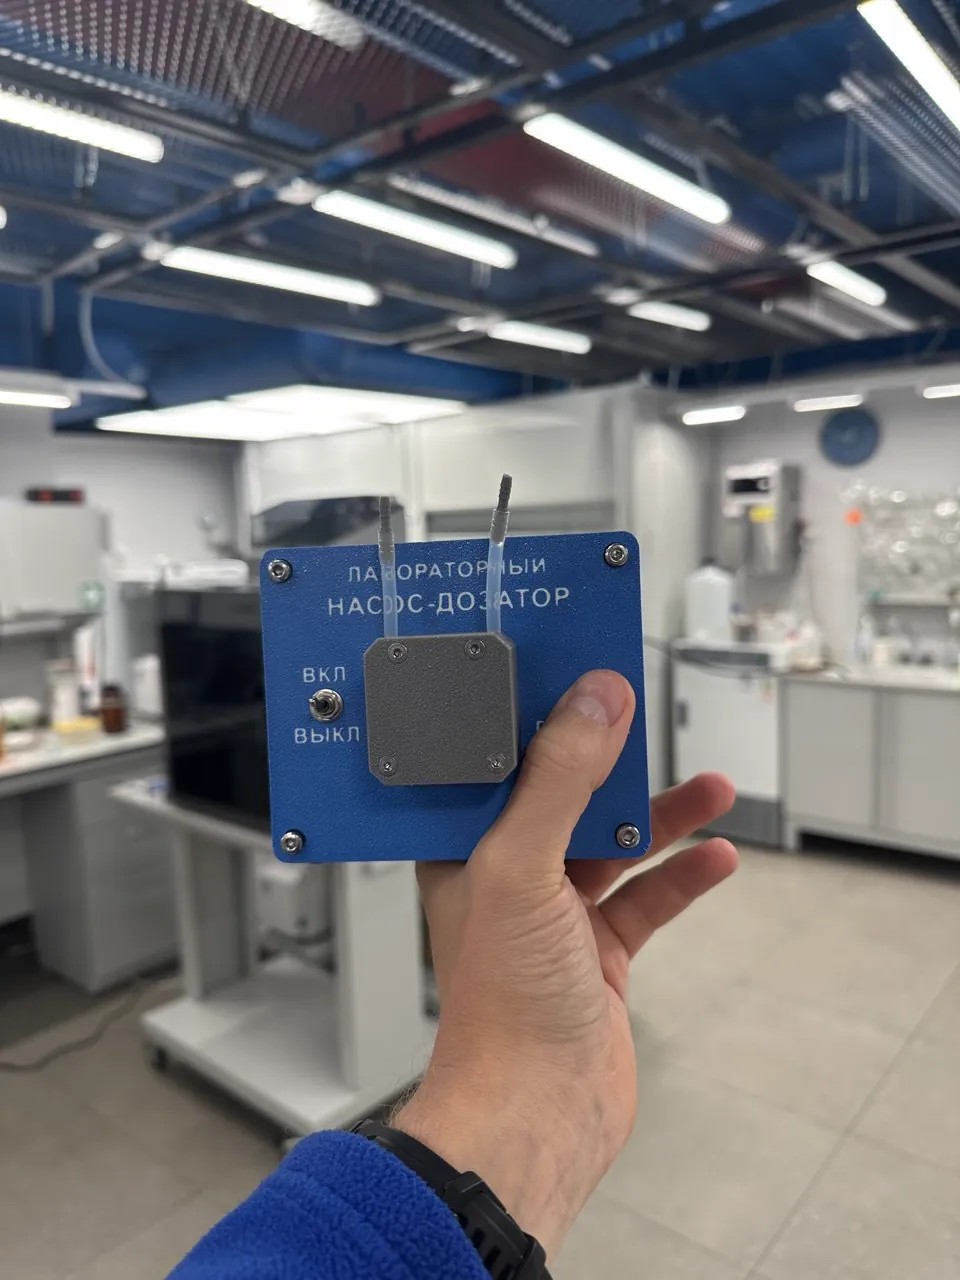
Why I built my own peristaltic pump
My water treatment lab rig needed three reagents dosed at 1–13 ml/min, with the dose set in mg/L. A ready-made lab peristaltic pump costs about $283 per channel, $848 for three. Affordable dosers for aquariums and home use run on a timer: they switch on by schedule, deliver a quick portion and stop. They can't feed a solution continuously at a set rate of 0.5 to 30 ml/min. Open-source designs from Thingiverse didn't work without rework.
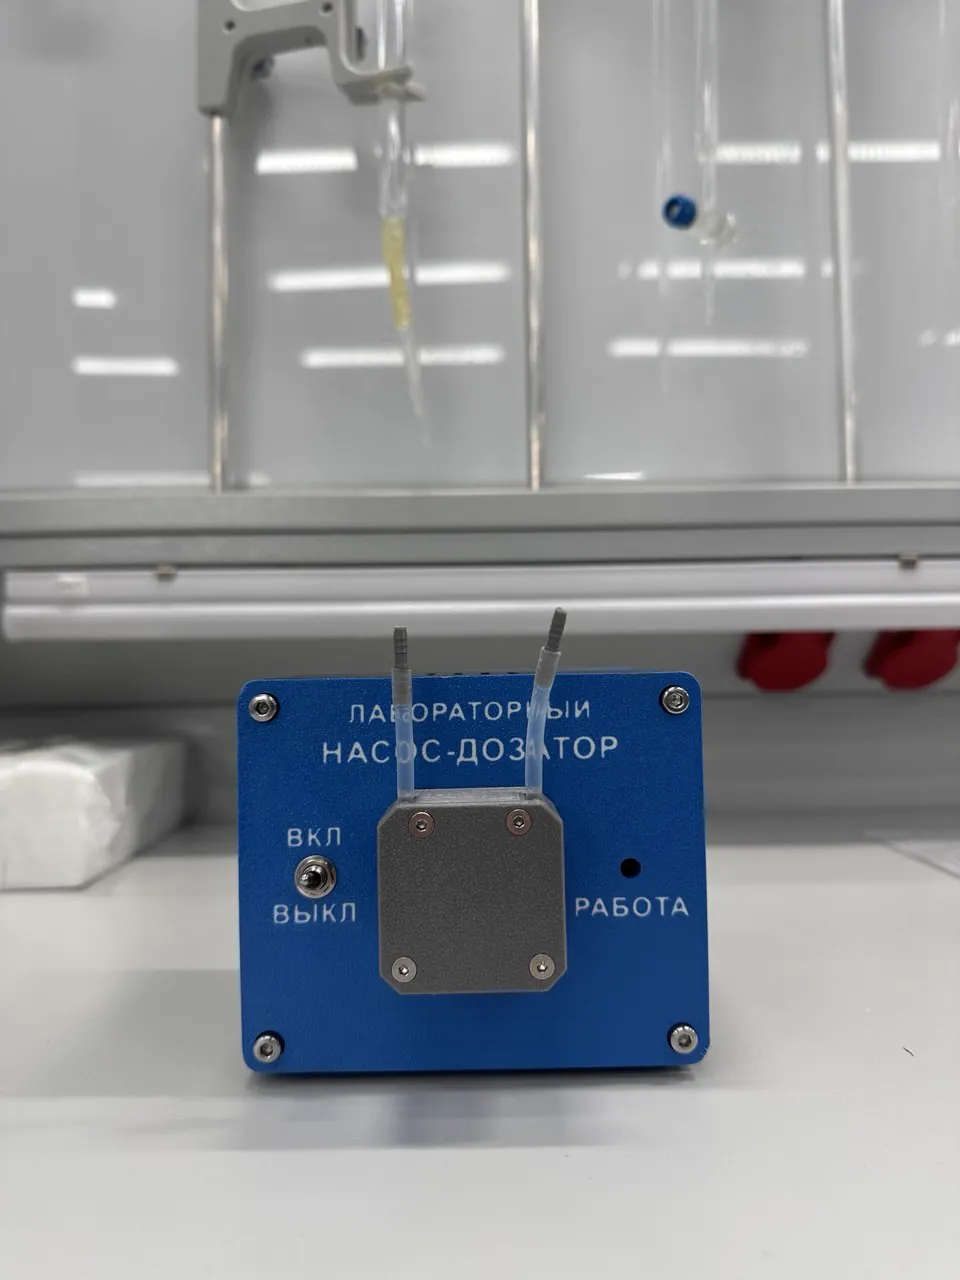
So I designed the pump myself. The head and case are 3D-printed. The motor and electronics come from Ozon (Russian marketplace). All parts are standard, and you can also buy them on AliExpress or Amazon. Parts for one pump cost about $60.
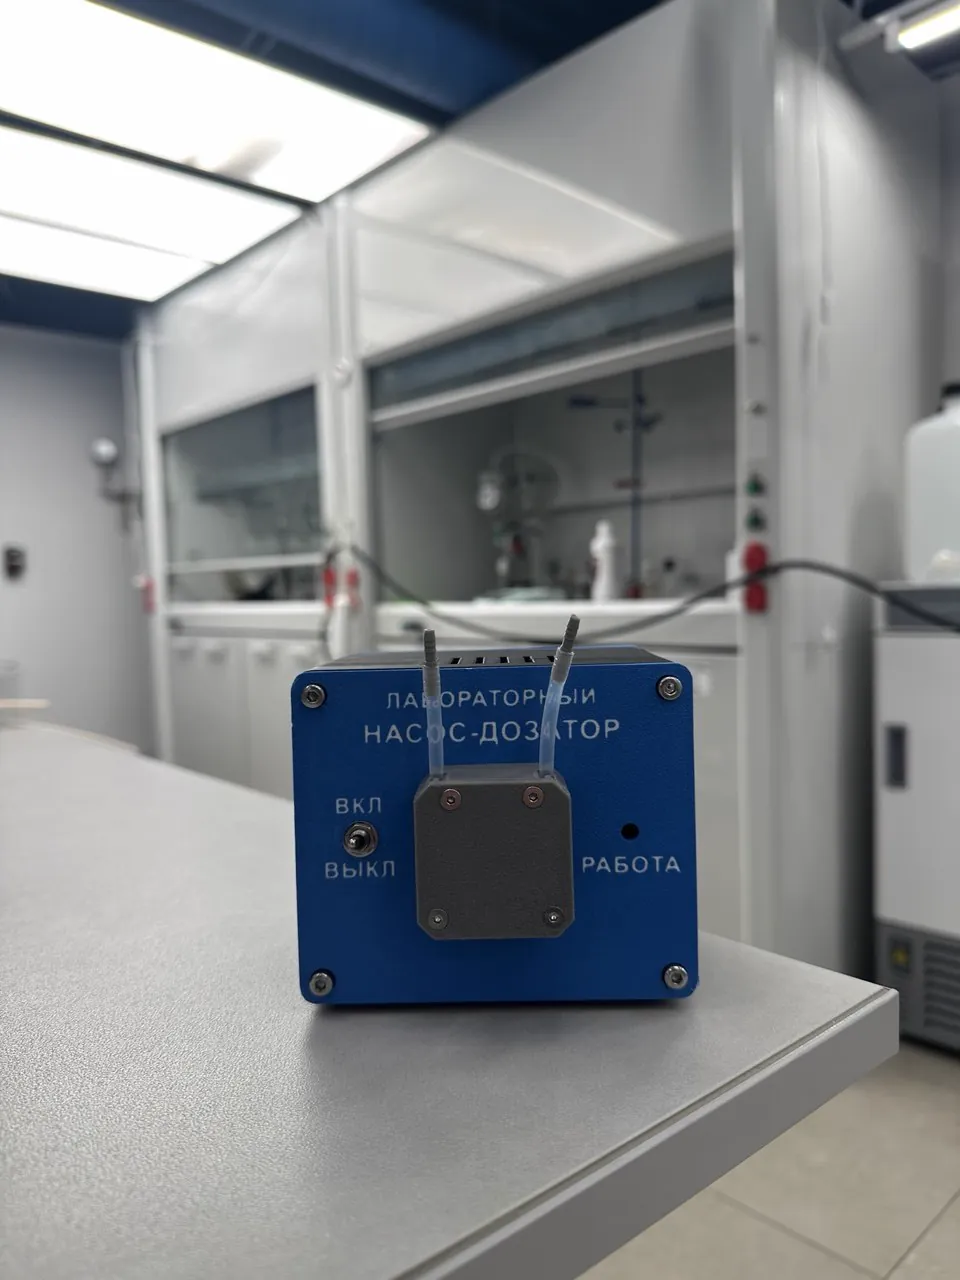
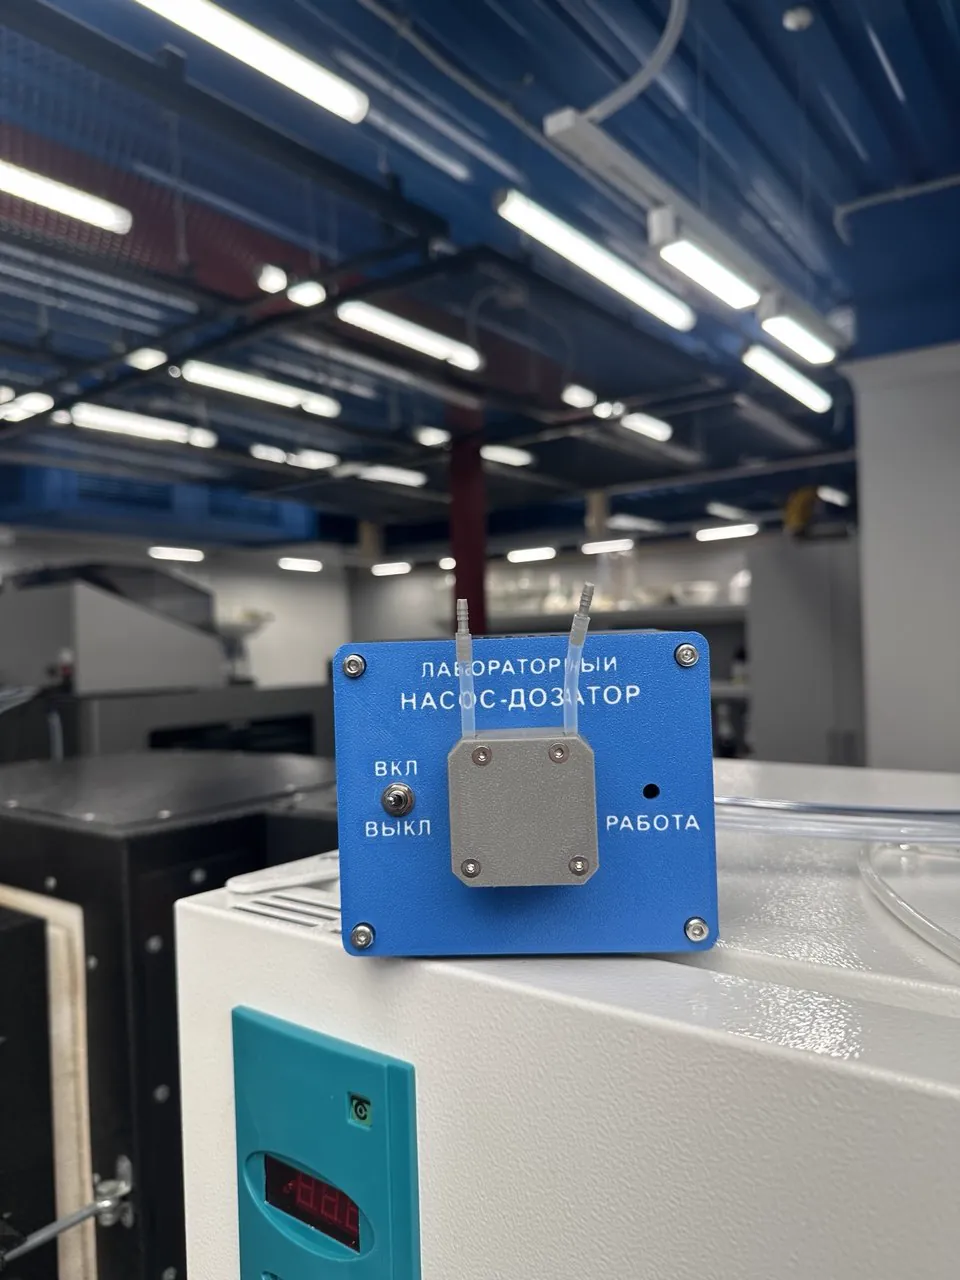
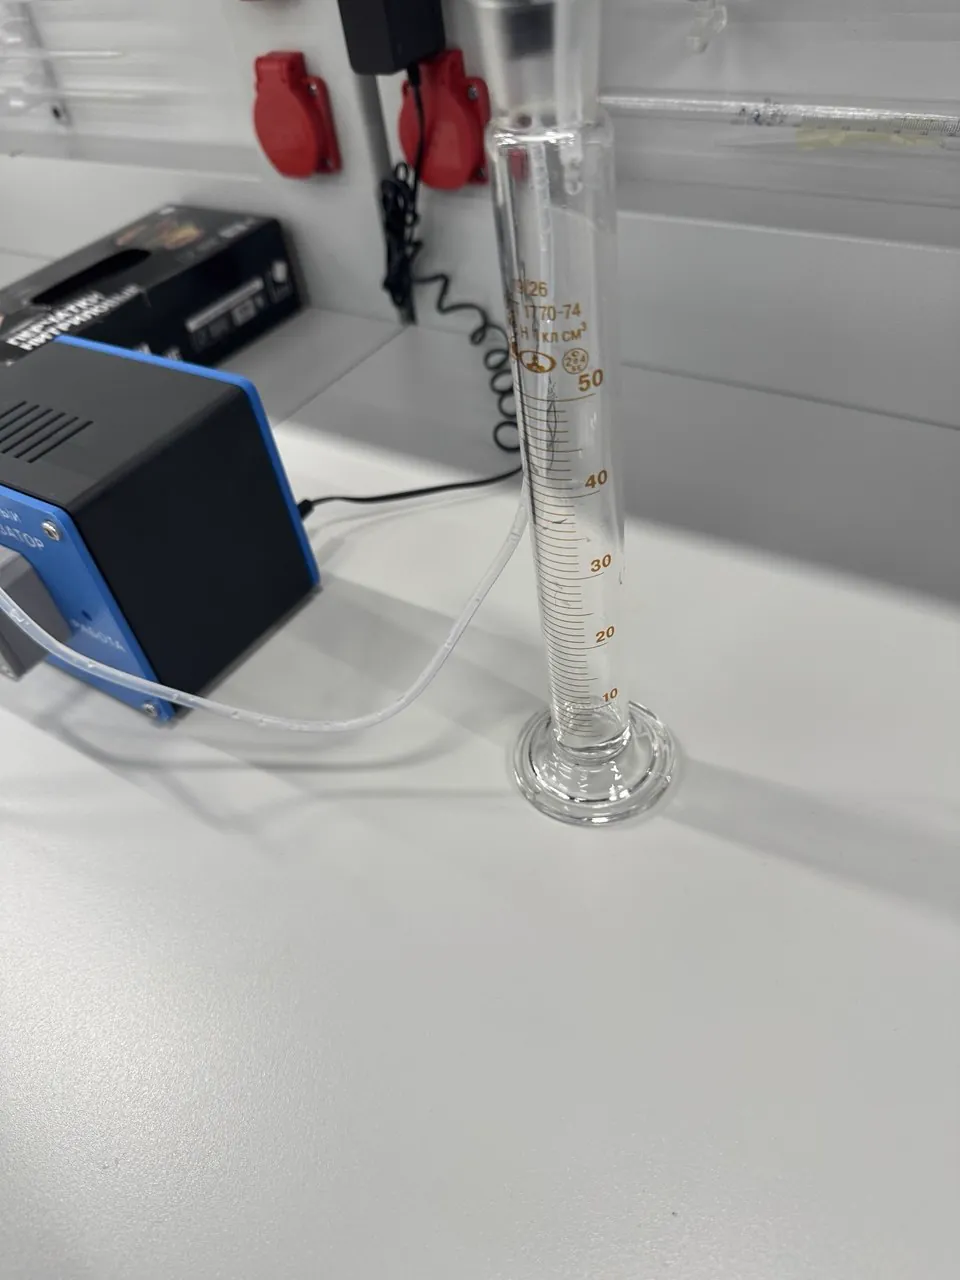
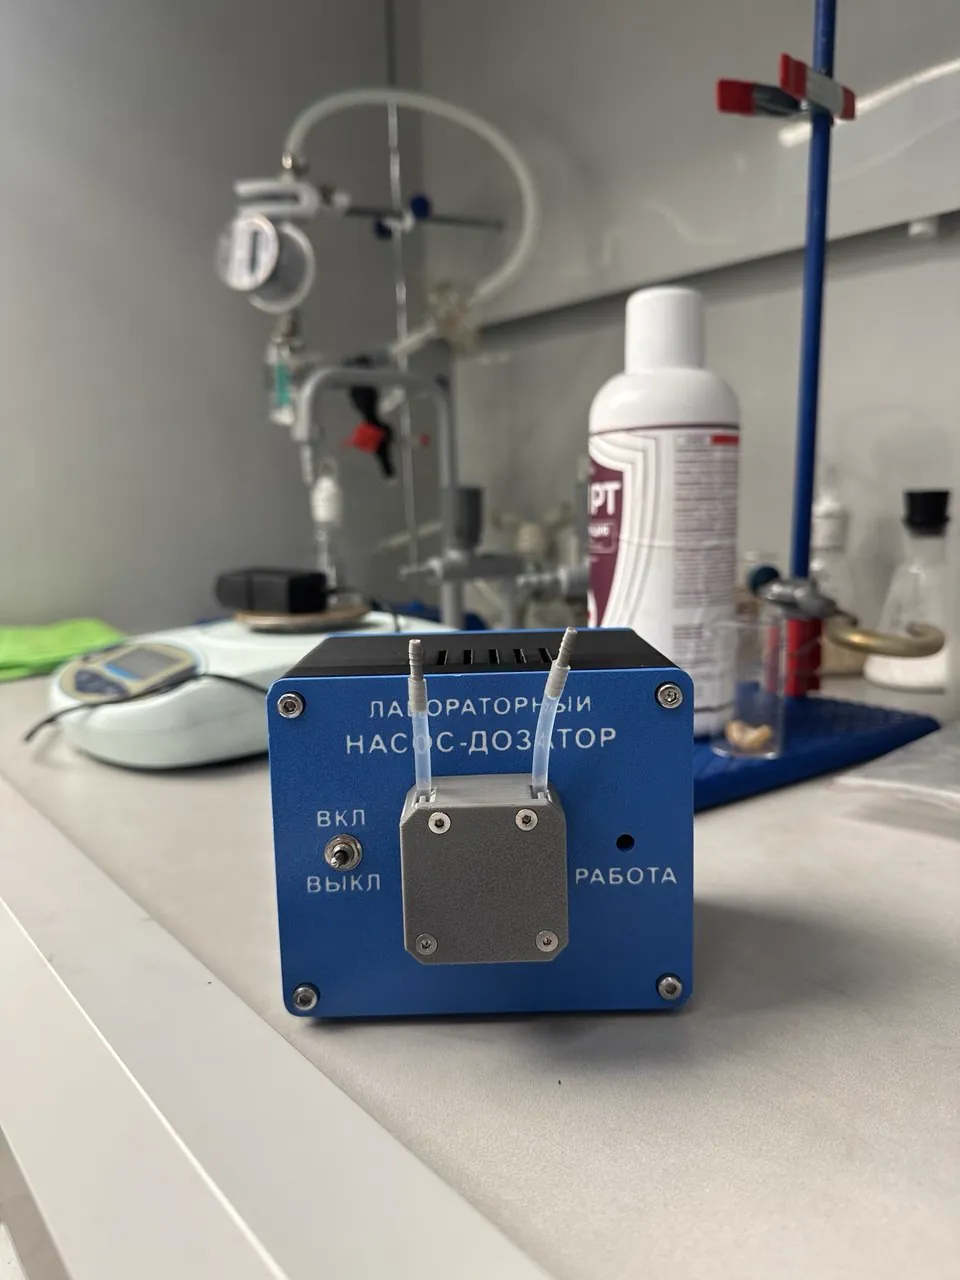
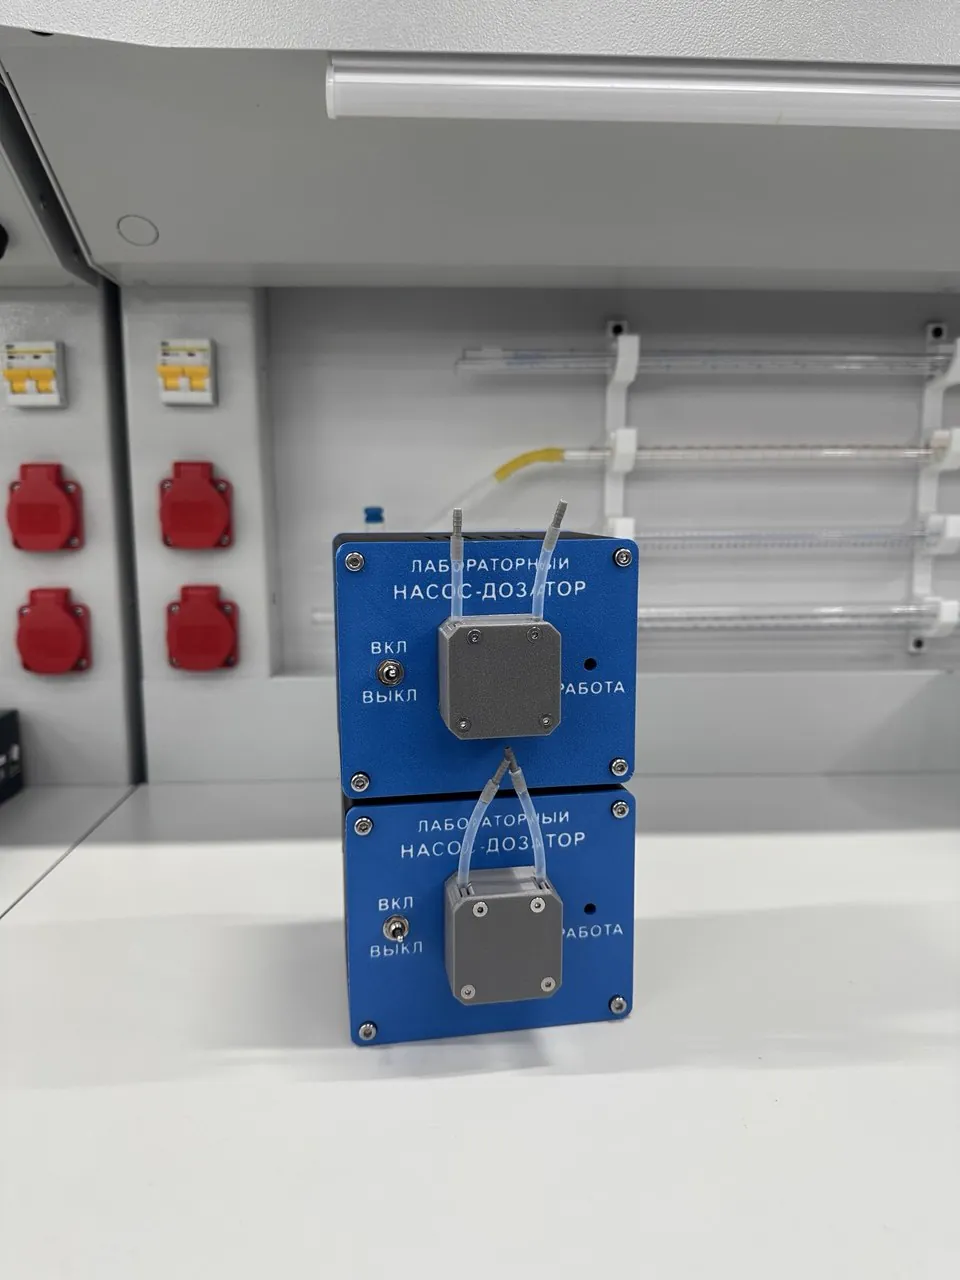
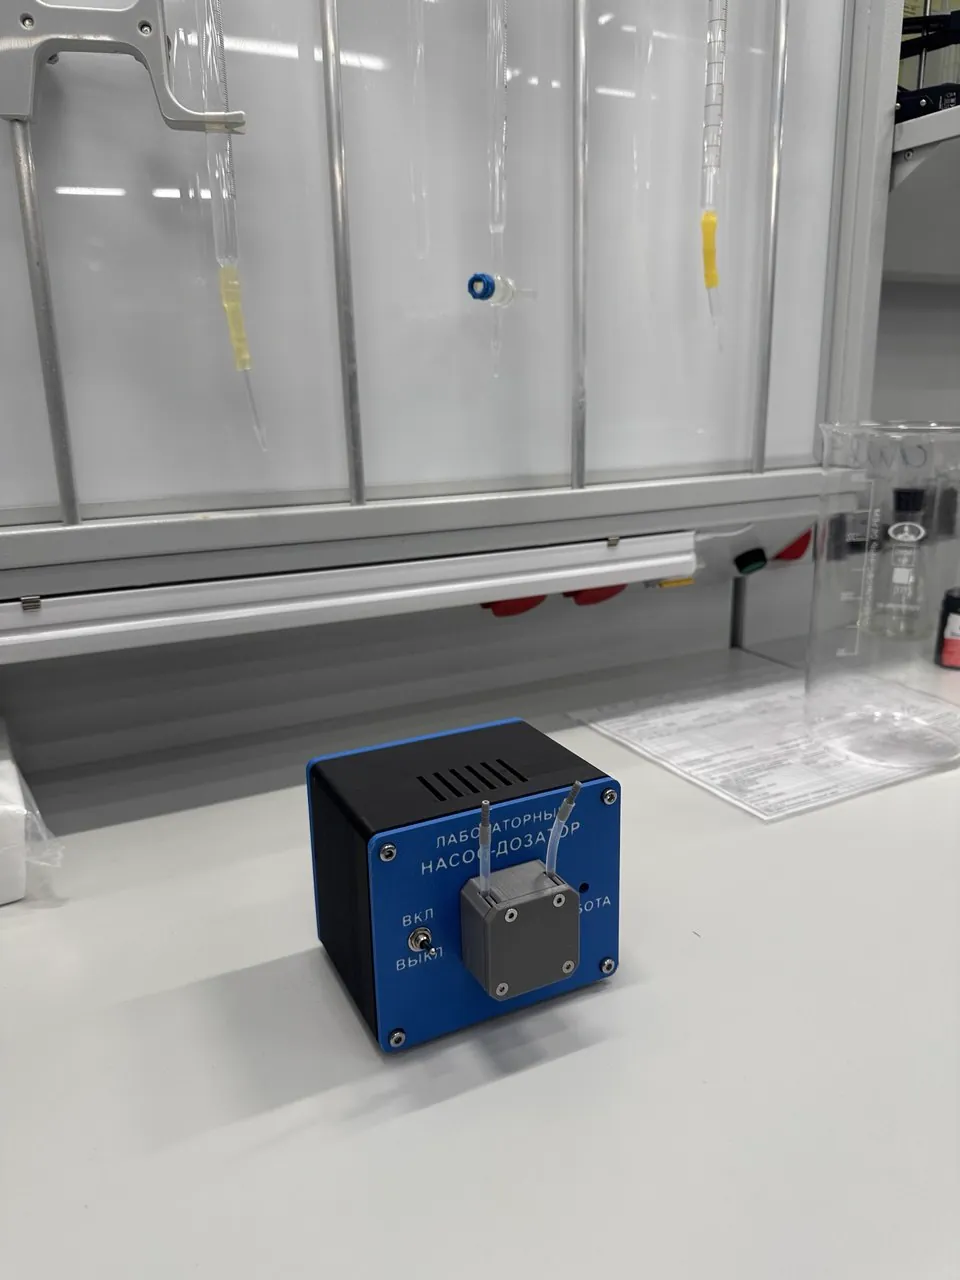
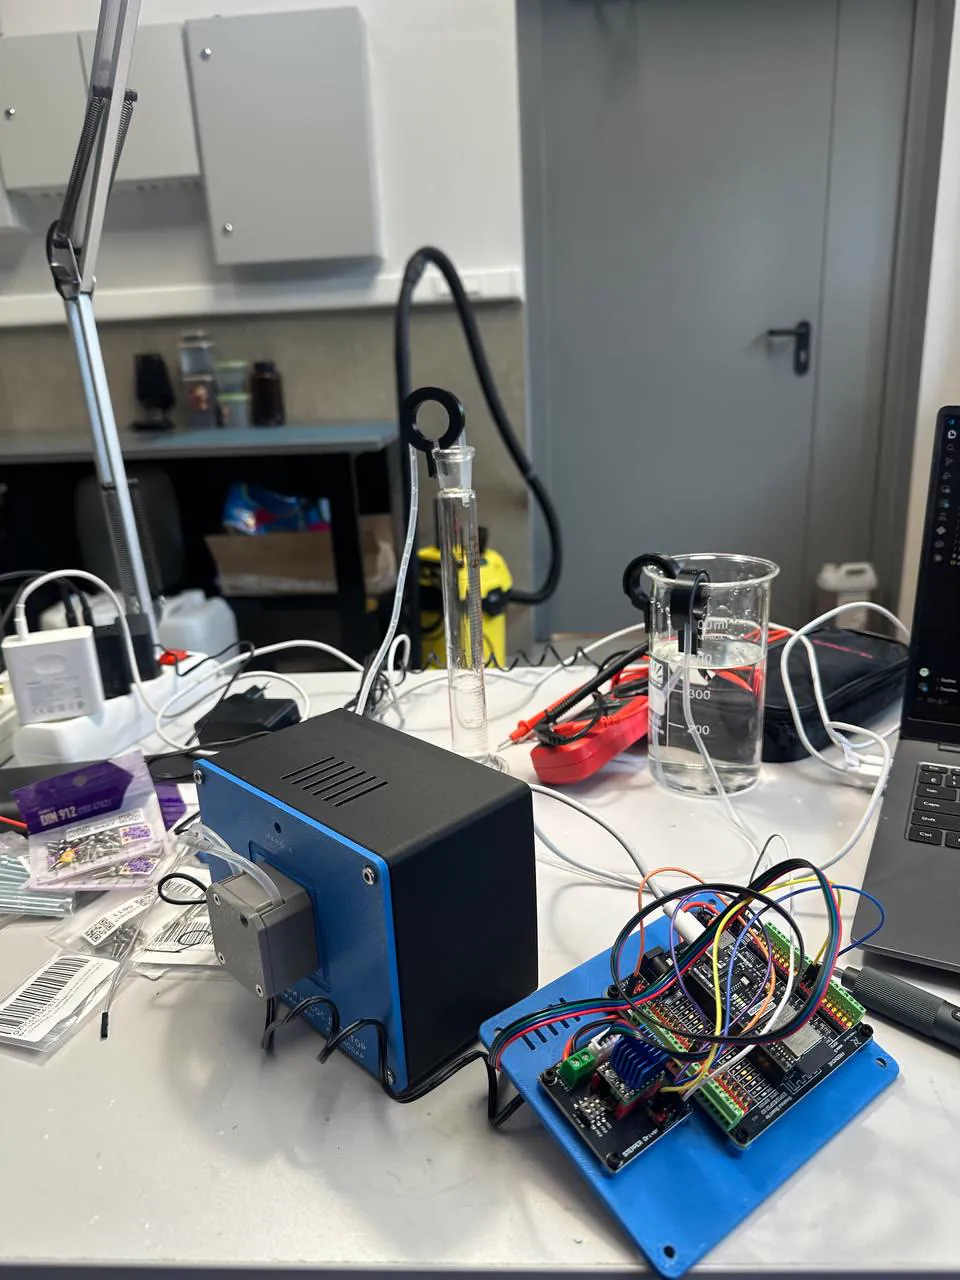
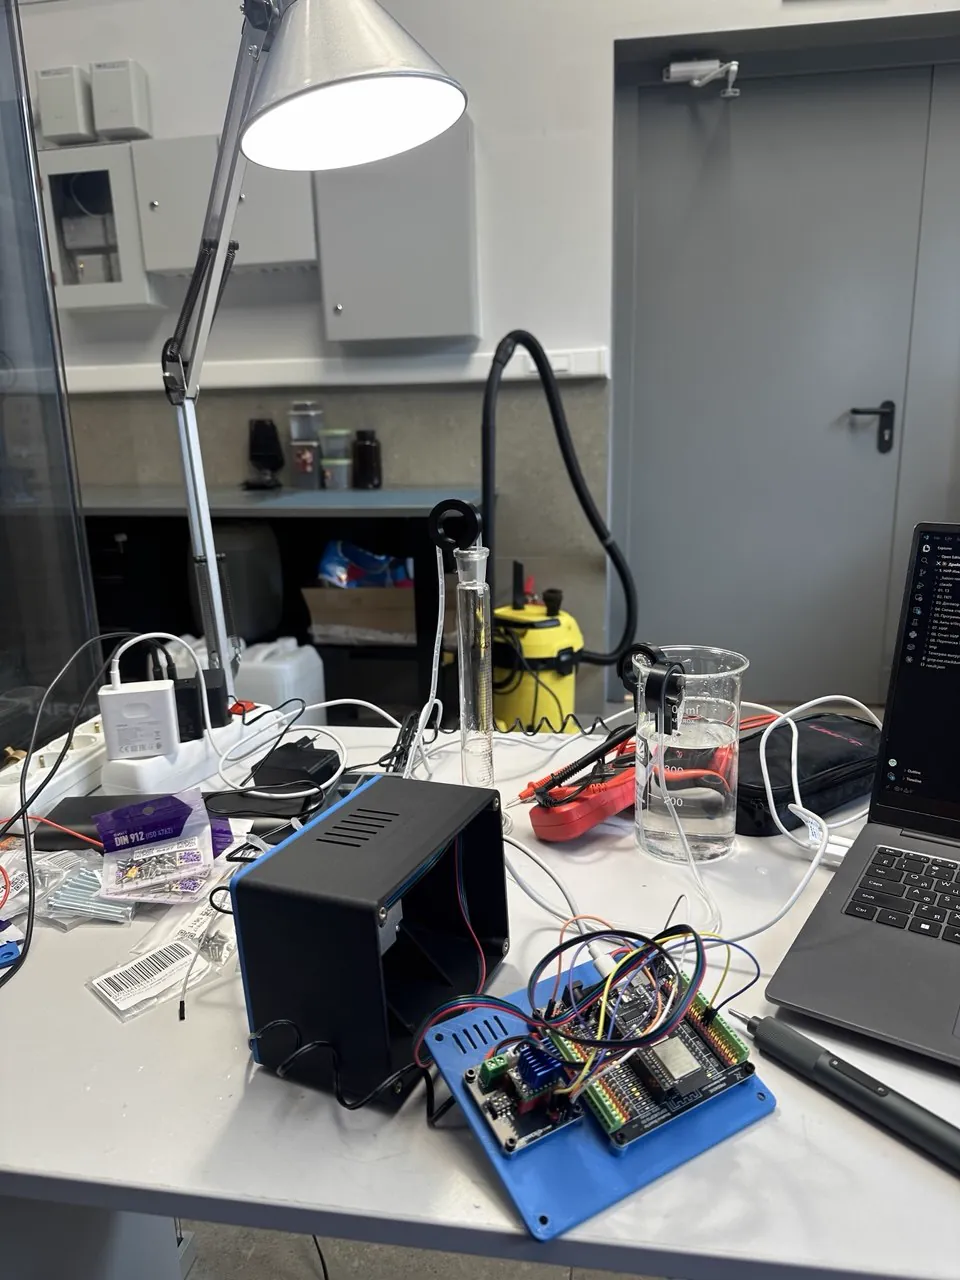
Three pumps are running on the rig, dosing coagulant and flocculant. I check the flow with a measuring cylinder. It matches the setpoint.
Where a dosing pump helps
The pump delivers an exact volume of liquid on a schedule or by dose. The solution touches only the tube, so you pick a tube for each liquid.
Labs
Reagent dosing on pilot and bench rigs, sample preparation, feeding a solution at a constant rate. You set the dose in mg/L.
Aquariums
Plant fertilizers, calcium, KH and magnesium for a reef tank. Scheduled dosing — "5 ml at 9:00" — is coming in the next firmware update, free for all buyers.
Pools
pH corrector, coagulant, chlorine products. For hypochlorite, use PharMed BPT tubing.
Drinks
Syrups, flavorings and additives for home brewing and drink making. With food-grade silicone tubing.
How the pump works
3 minutes 25 seconds, narrated in Russian. Click a chapter to jump to it.
How the 3D-printed peristaltic pump works
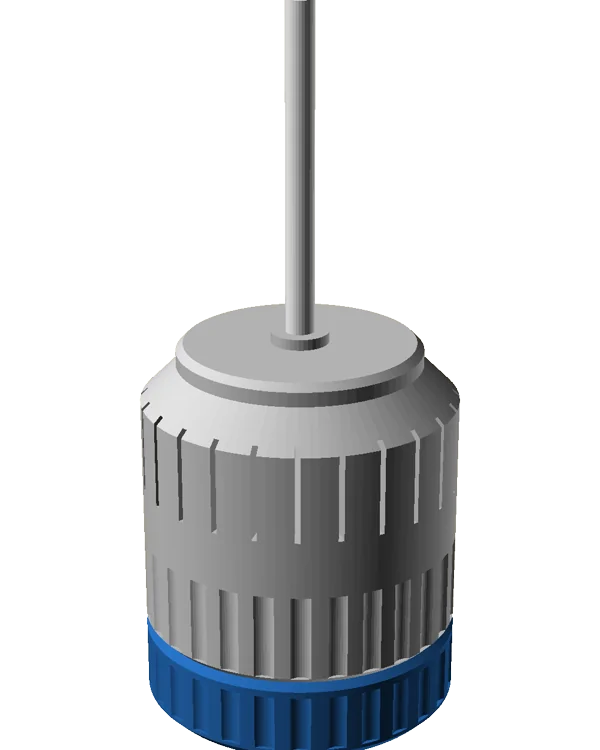
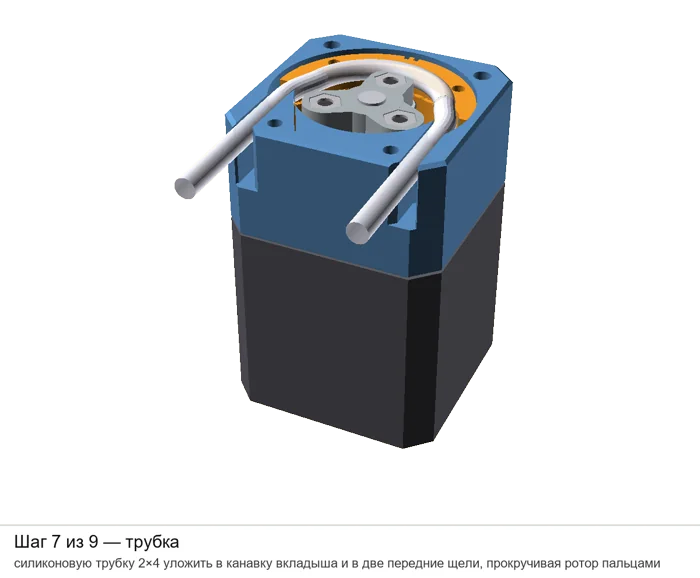
Inside the head is a rotor with three rollers. The rollers squeeze the silicone tube and push the solution forward. The solution touches only the tube. You don't need to flush the head or motor, and for an aggressive reagent you just change the tube.
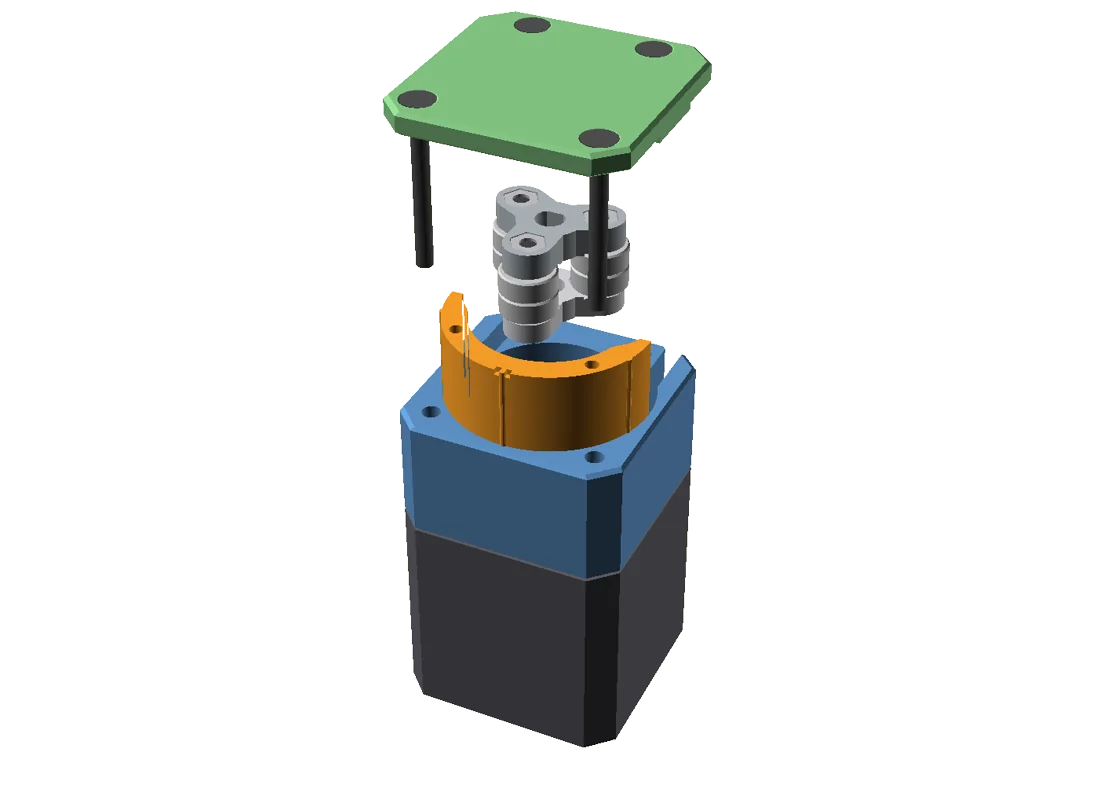
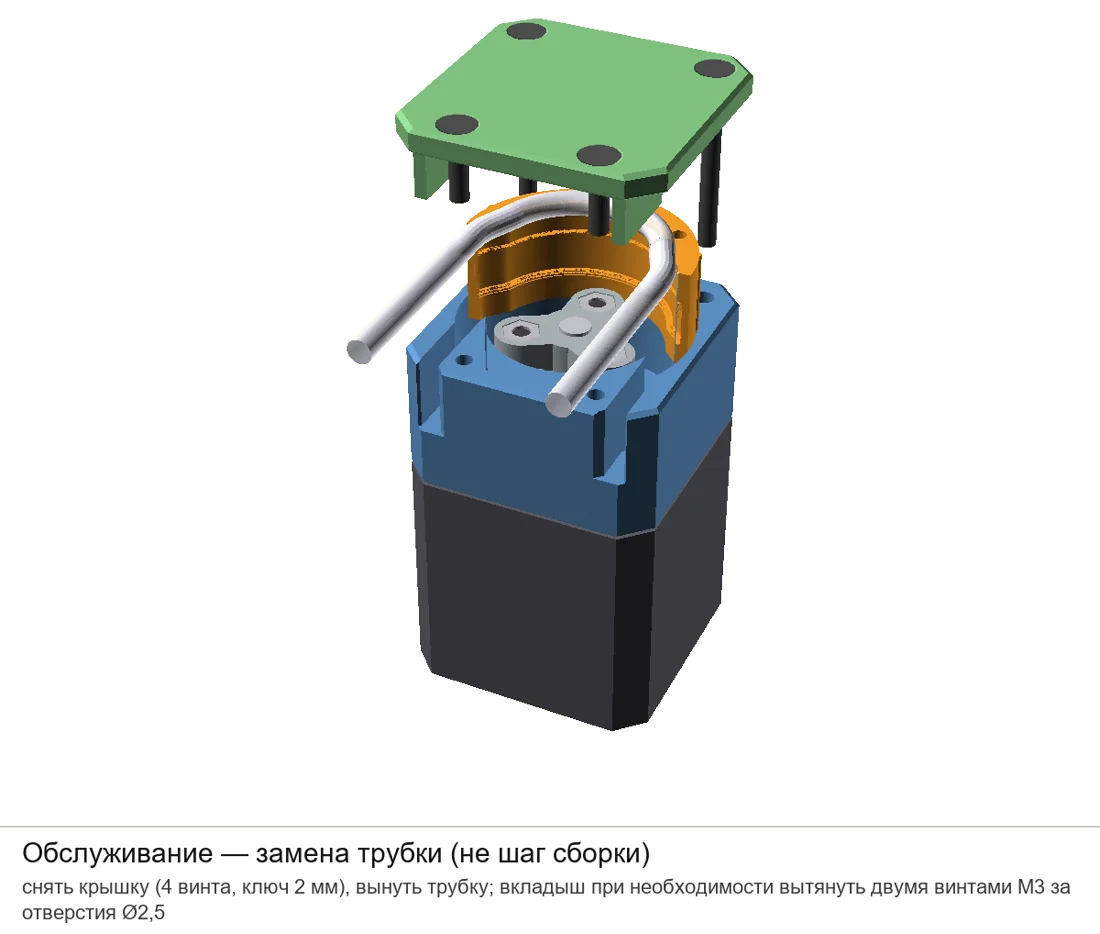
- Item 1Cover. Held by 4 M3 screws. Comes off in a minute when you need to change the tube.
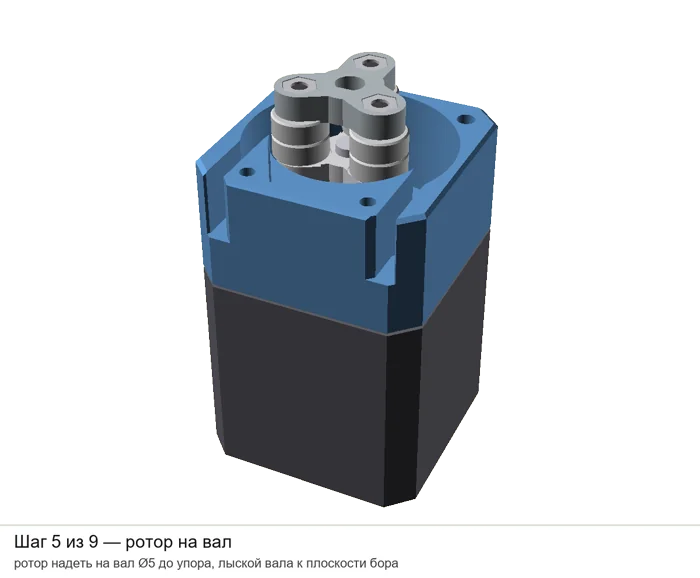
- Item 2Rotor. Three rollers, each on two 623 bearings. The rollers roll along the tube and don't wear it through.
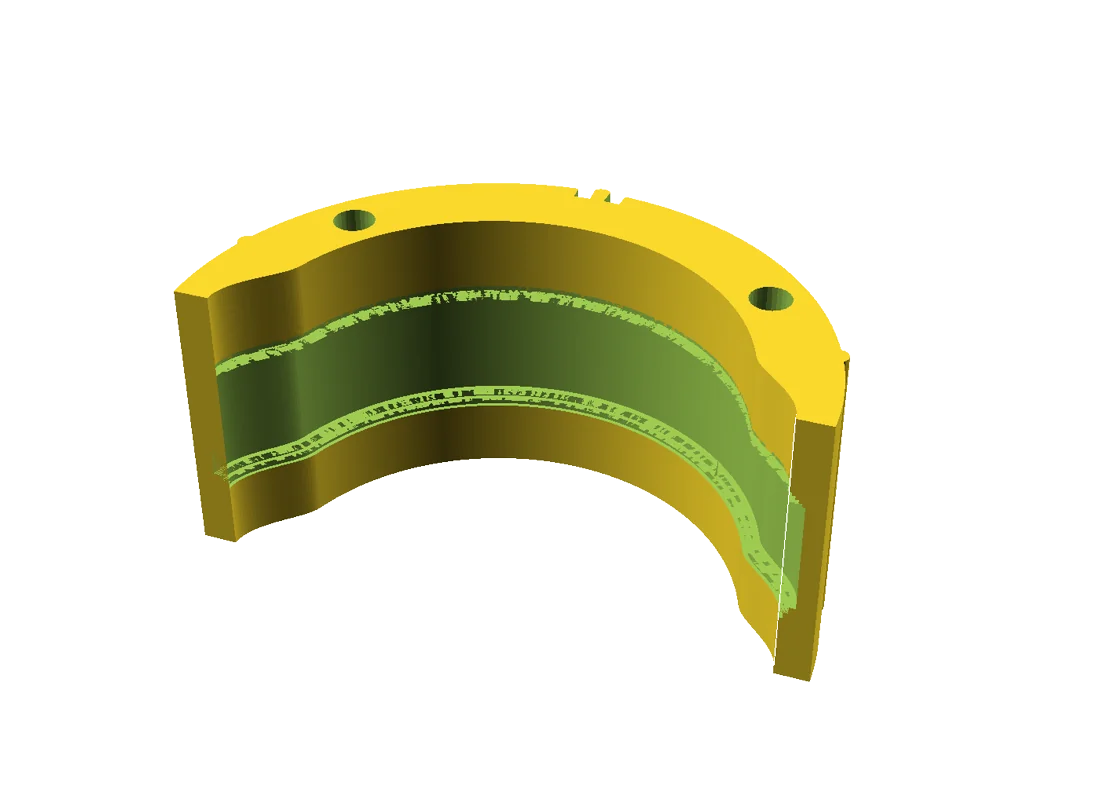
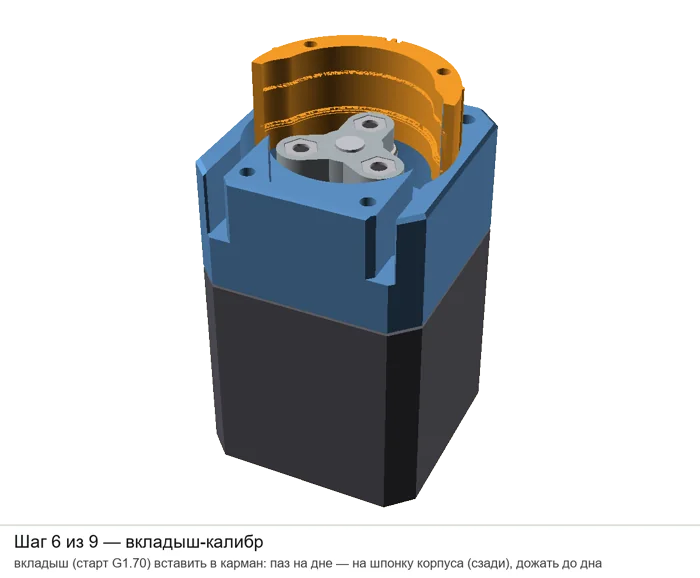
- Item 3Gauge insert. 180° wrap arc. At least one roller always pinches the tube, so the solution can't flow back.
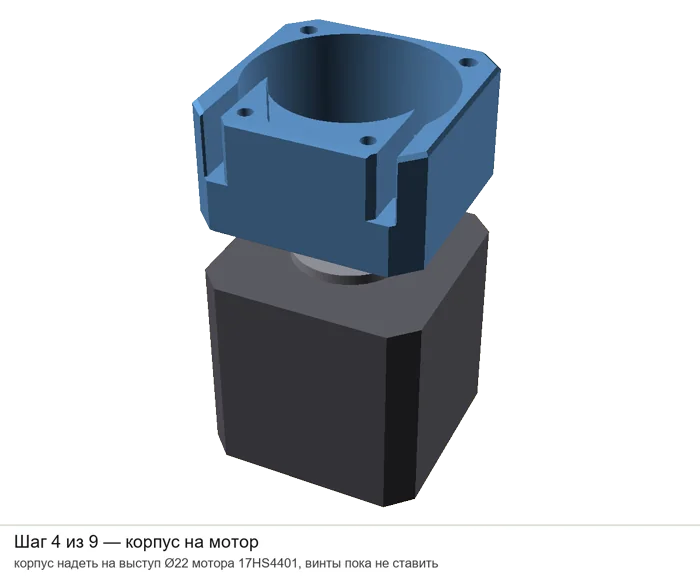
- Item 4Head body. Mounts directly on the motor flange.
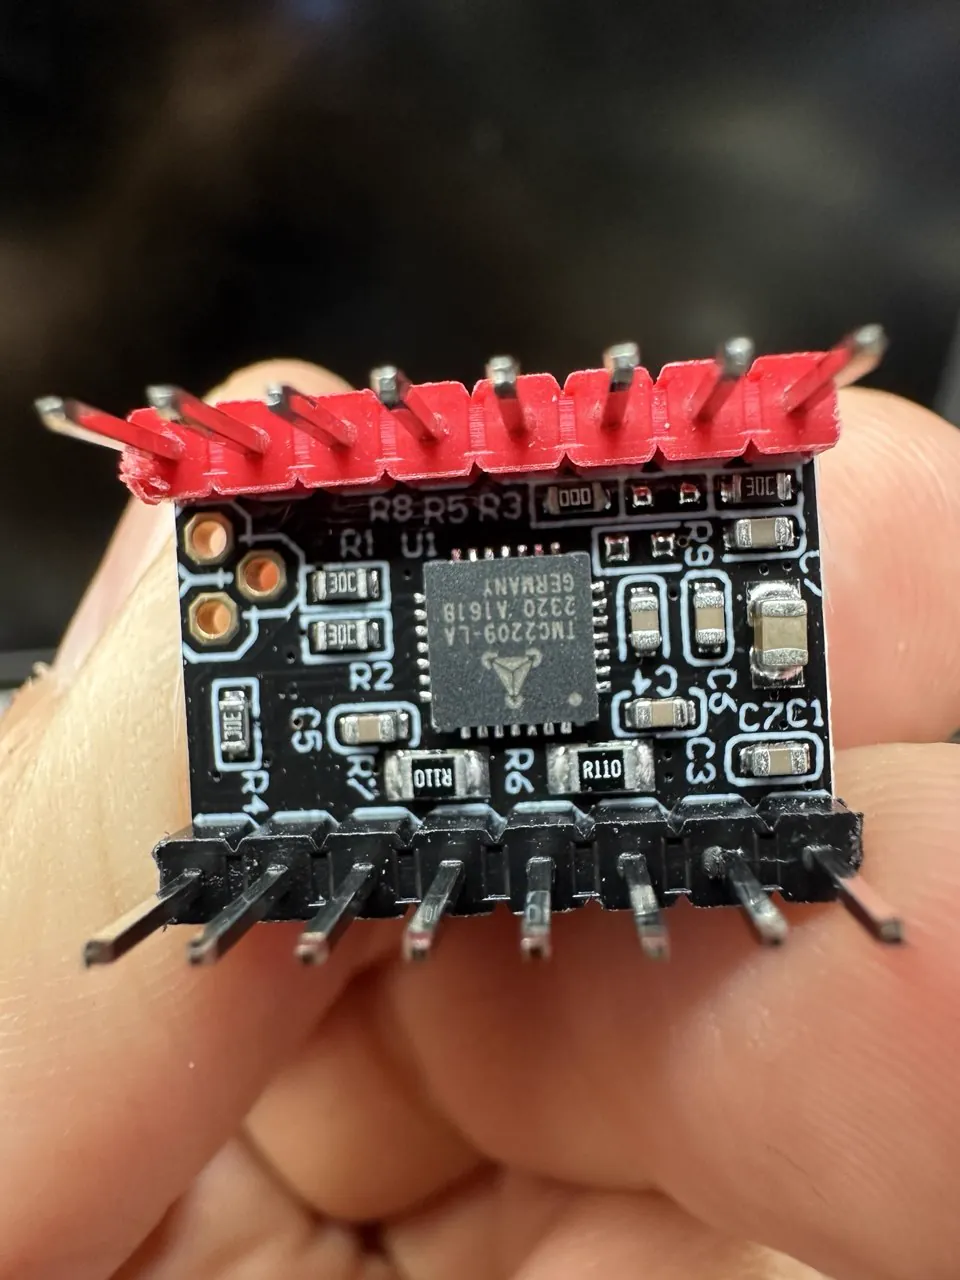
- Item 5NEMA17 motor. The TMC2209 driver runs in StealthChop mode, so there's no stepping hum.
An insert sets how hard the tube is pinched
Tubes from different batches differ in softness. So a replaceable insert sets the pinch. The documentation includes ten of them, from G1.0 to G1.9. You read the number from the notches on the end face.
Electronics: ESP32, TMC2209 and NEMA17
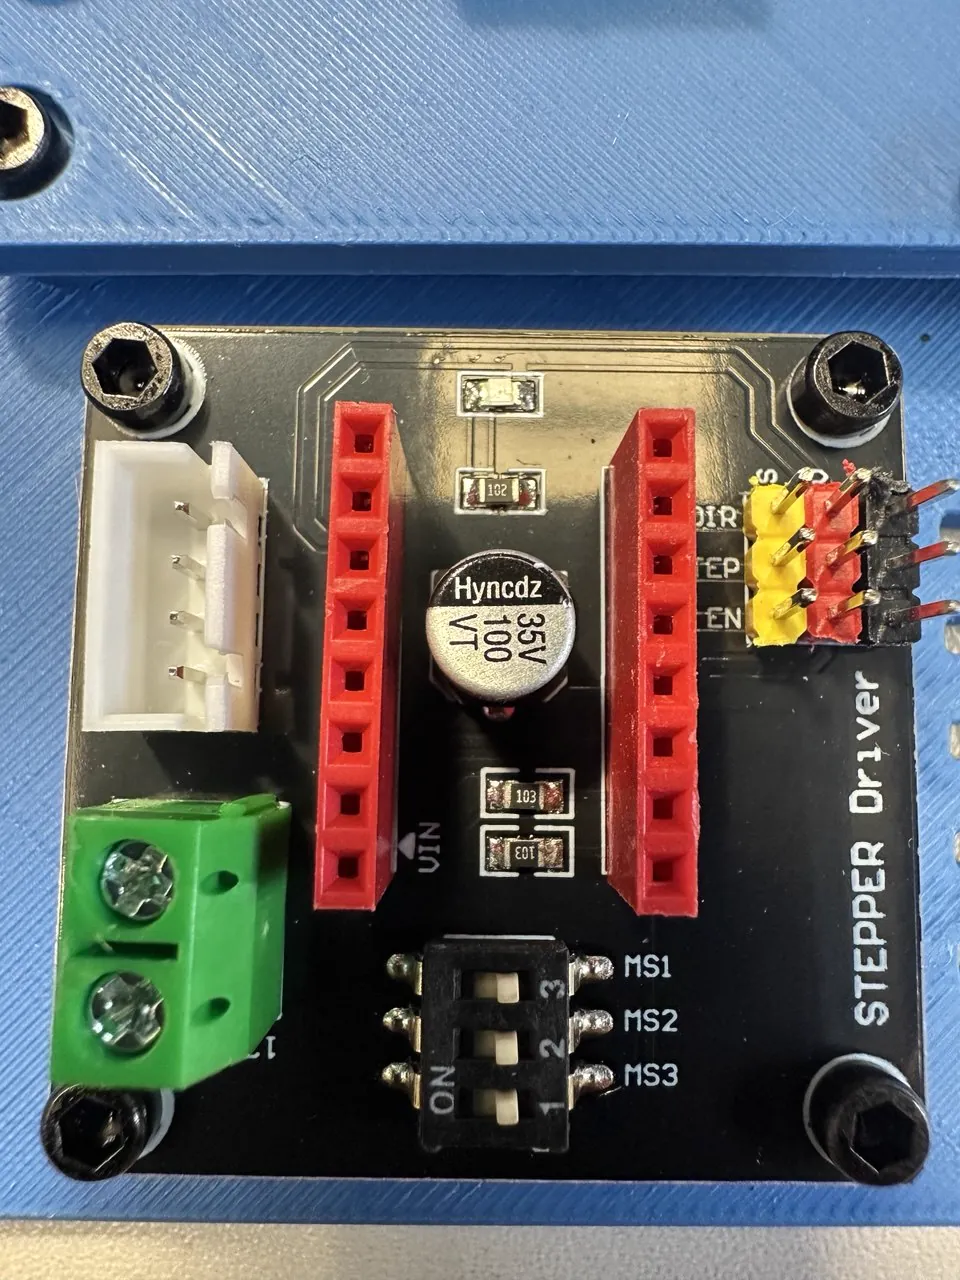
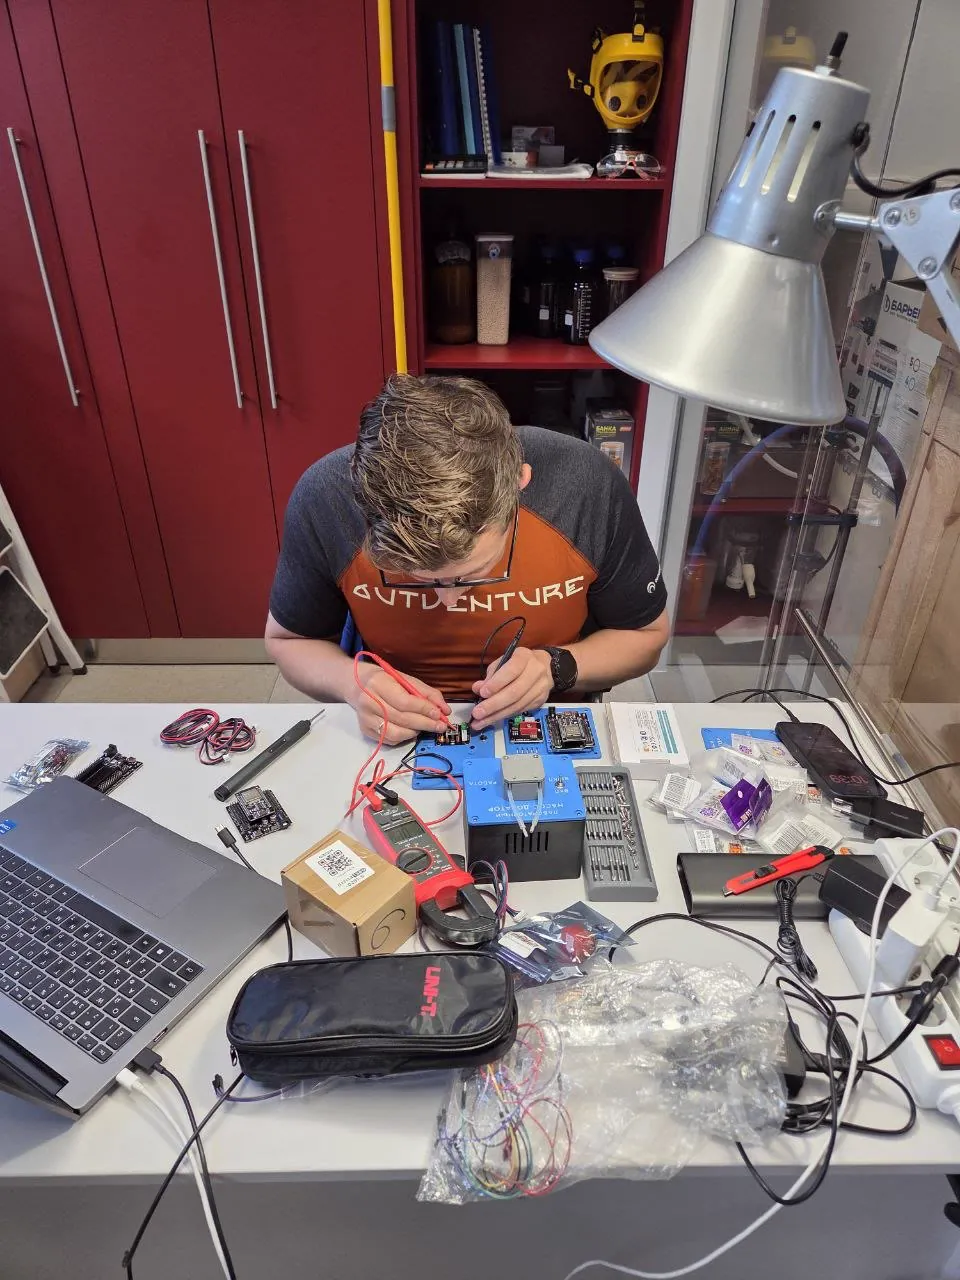
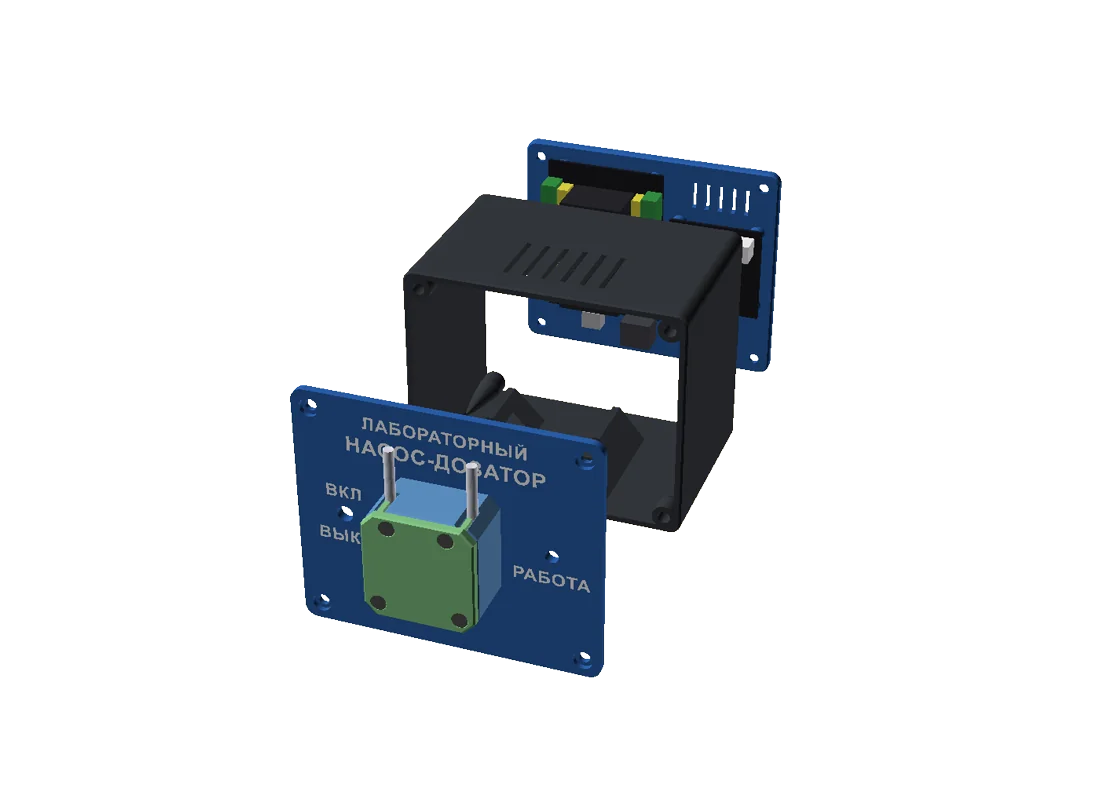
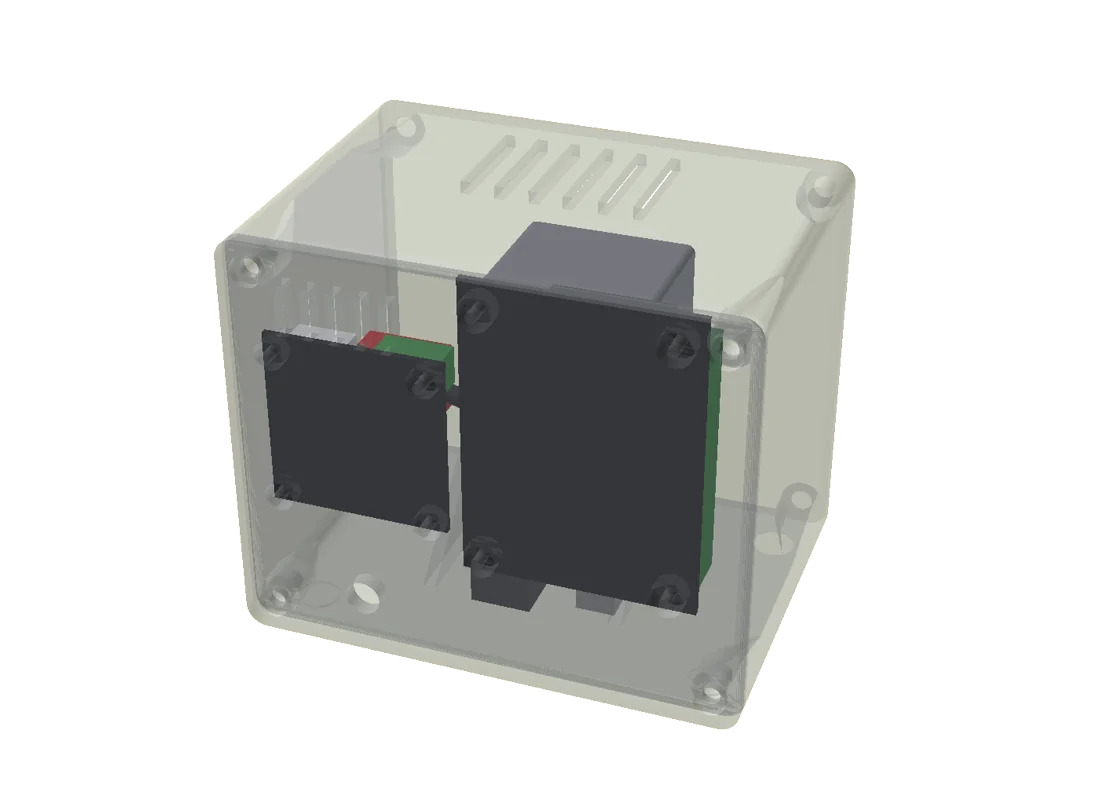
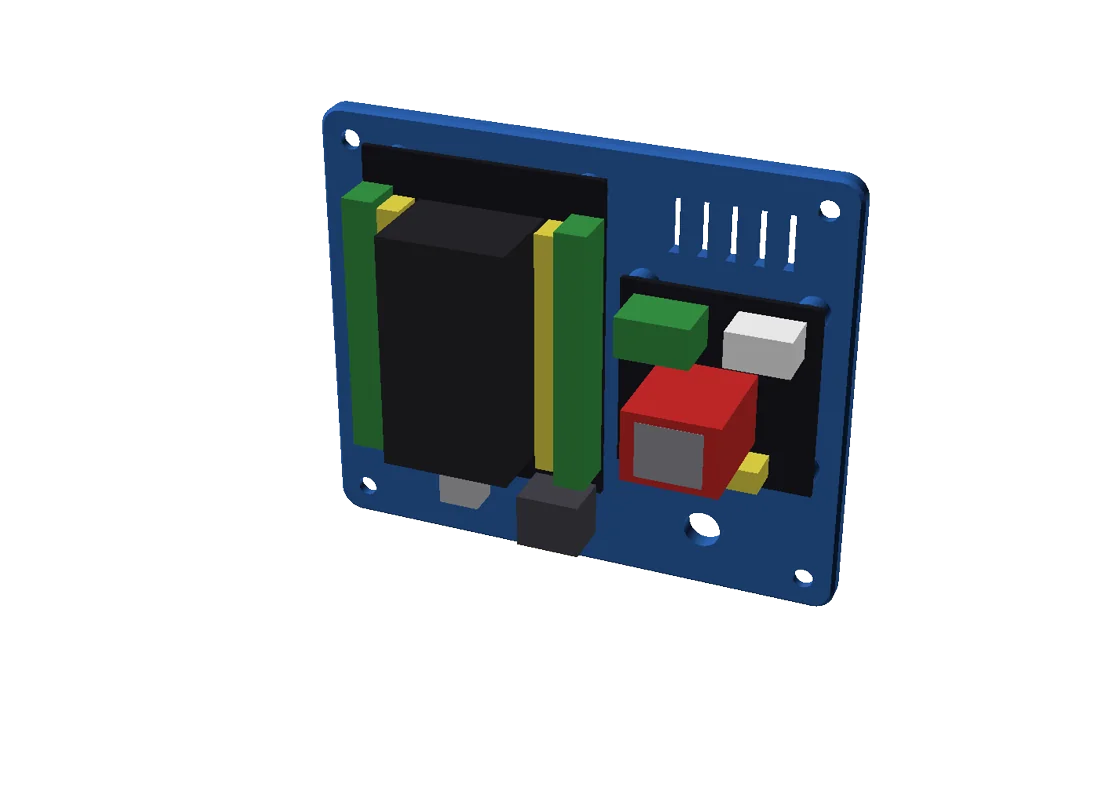
An ESP32 board with Wi-Fi runs the pump. It drives the motor through a TMC2209 driver and serves the app. Power comes from a 12 V adapter. Everything fits in a printed case of 118×88×99 mm. The boards mount on the back cover, so you can wire the electronics on the bench and then slide them into the case in one piece.
Control from your phone
Each pump runs its own Wi-Fi network. Connect your phone and the app opens by itself, nothing to install. You can also connect the pump to your lab network.
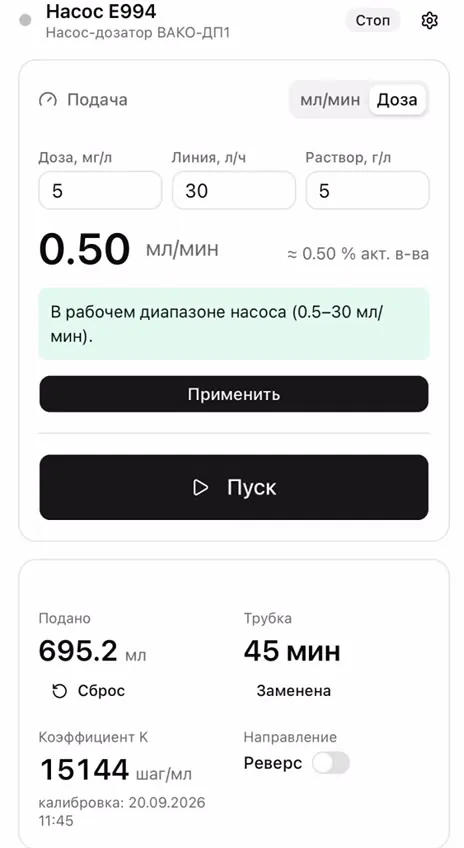
Dose in mg/L
You enter the dose, the line flow and the solution concentration. The pump calculates ml/min.
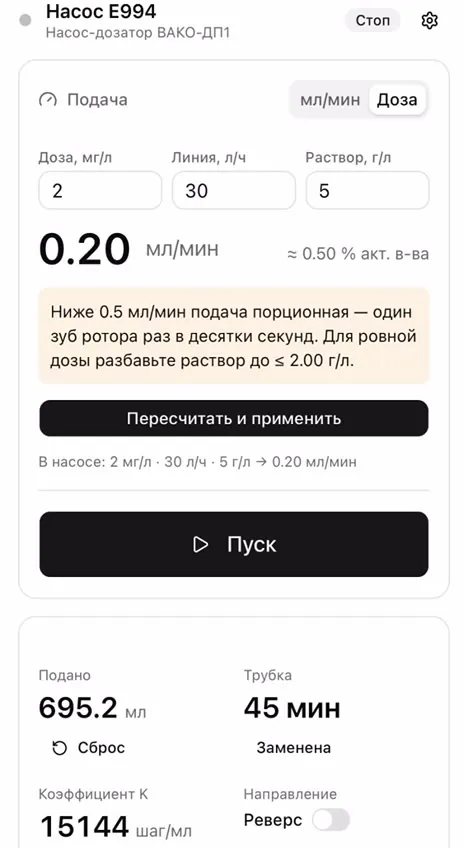
Hints
If the flow is below 0.5 ml/min, the app suggests diluting the solution so dosing stays even.
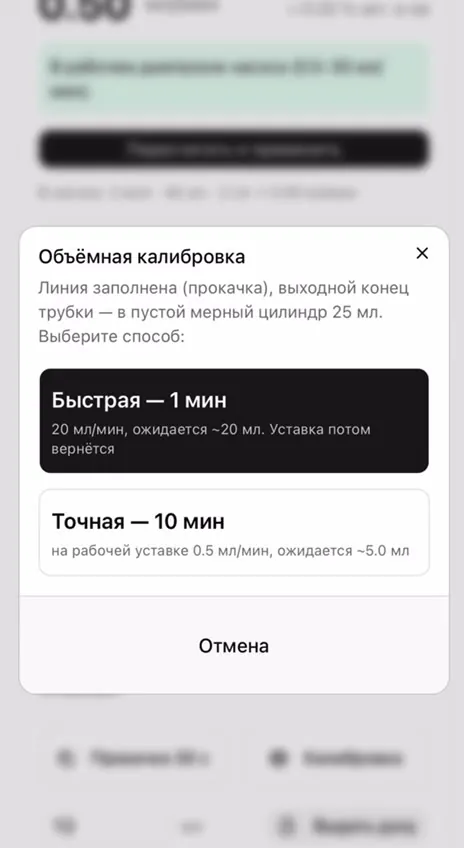
Calibration
You put the tube into a measuring cylinder and enter the volume. The pump recalculates its factor.
What else the app does
- Counts the volume delivered.
- Tracks tube run time, so you see when to replace it.
- Primes the line in 30 seconds.
- Delivers a one-off dose of a set volume.
- Runs in reverse.
- Serves data over HTTP as JSON, so you can connect the pump to your automation.
- Updates the firmware over Wi-Fi.
- Coming in the next update: scheduled dosing — a set volume at a set time, for example 5 ml at 9:00 every day. Free, over Wi-Fi.
Clip and intake: the tube stays where it should
The pump doses accurately as long as the tube is routed right: at the outlet it must not slip out of the tank or kink on the rim, at the inlet it must not float up in the canister and suck air. Two printed parts take care of that. Both are included in the documentation.
Clip for the tank wall
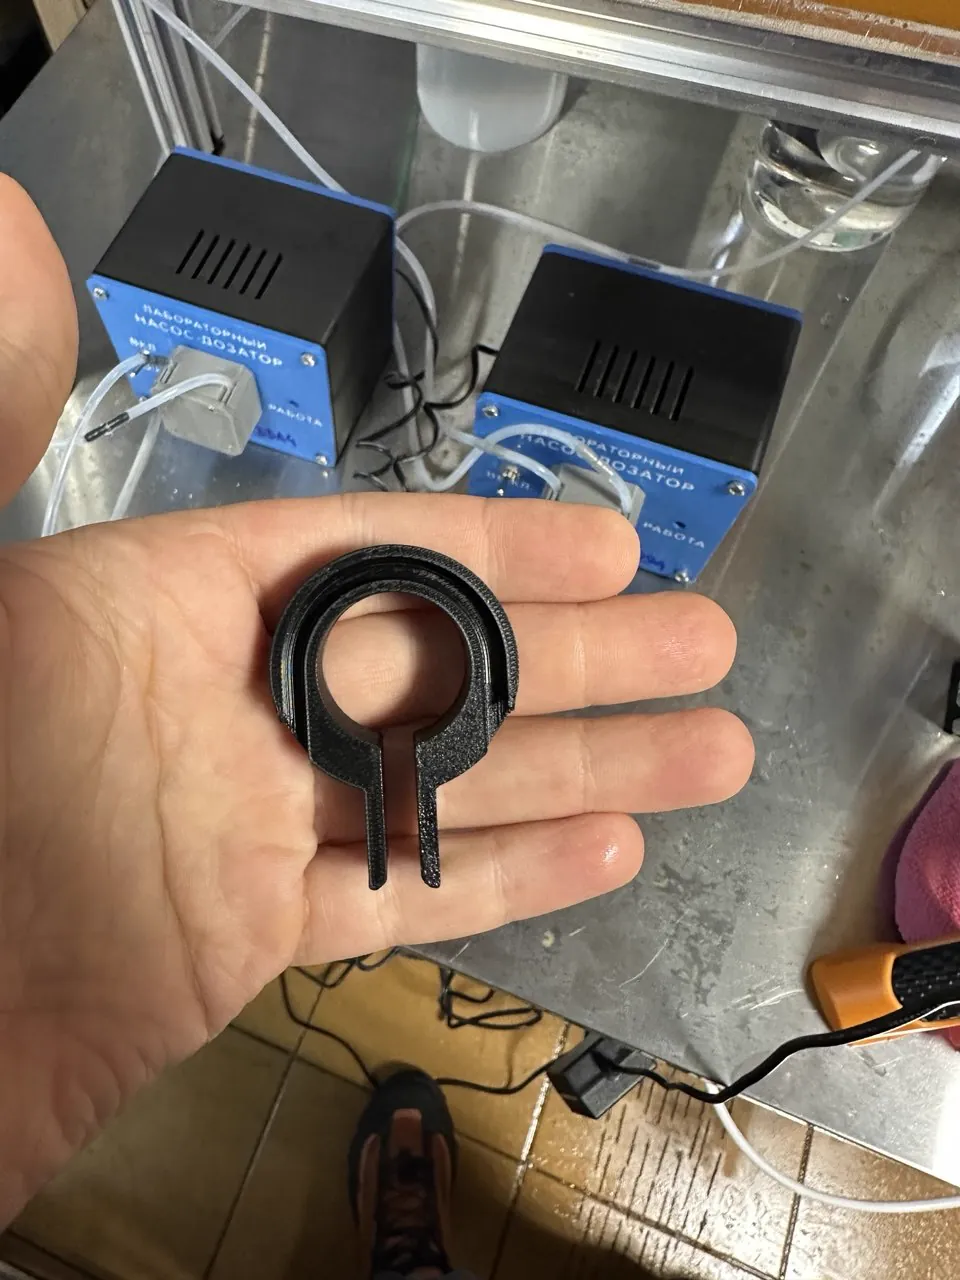
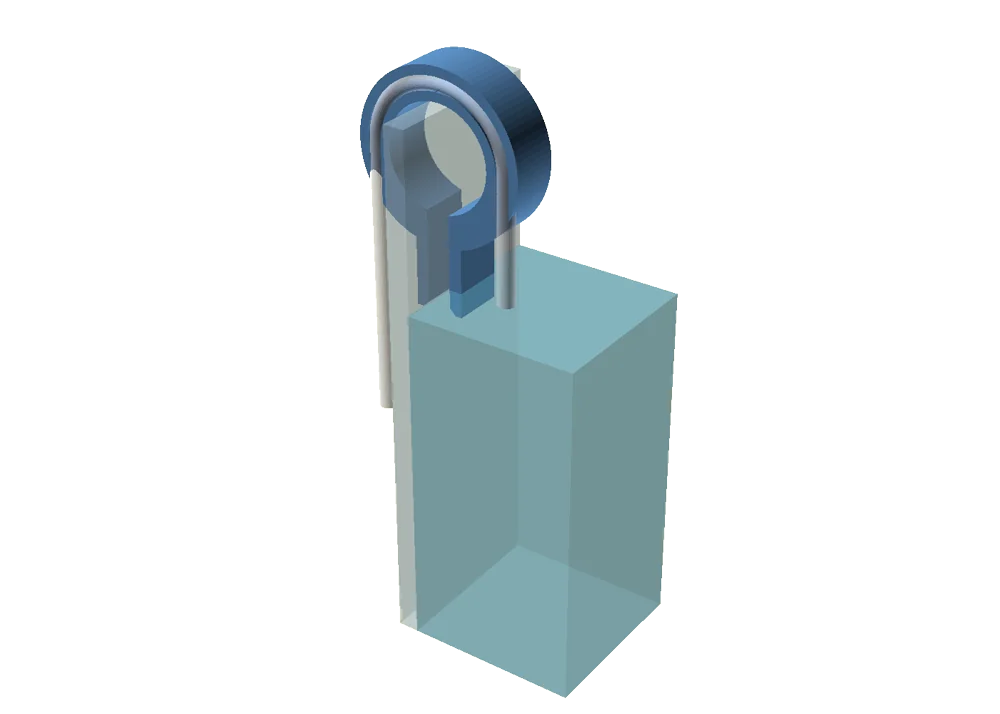
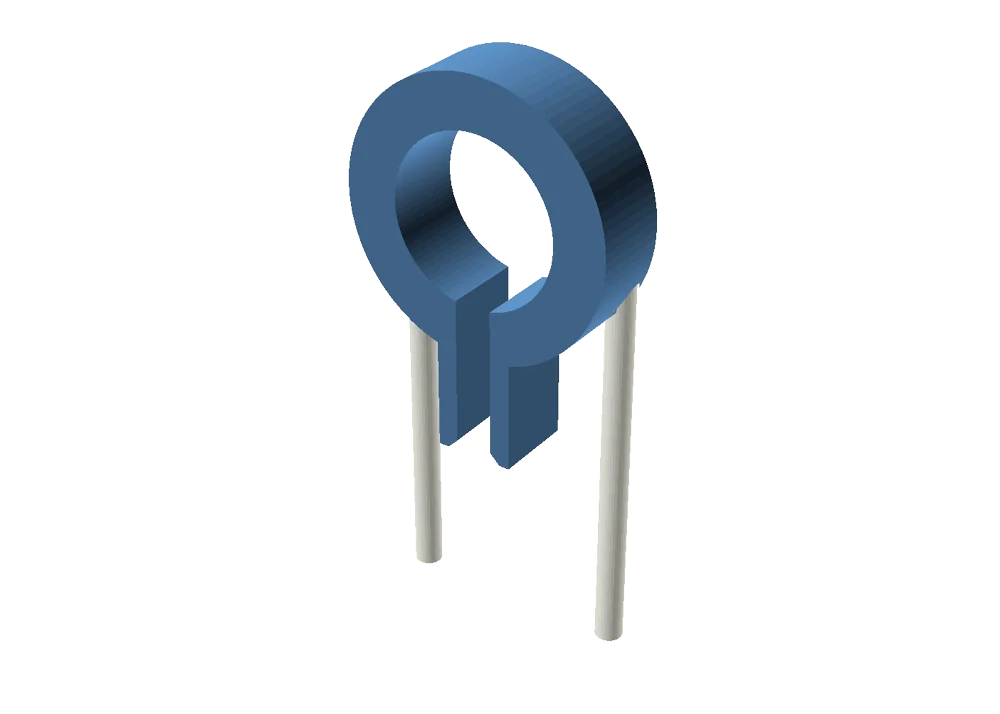
The ring clip slides onto the rim of a tank wall — aquarium, flocculator, container — and holds without glue or screws. The tube snaps into a groove: the 3.2 mm slot is narrower than the 4 mm tube, so it doesn't fall out. Inside the clip the tube follows an R10 arc and doesn't kink on the rim. The tube end goes under the water surface — no drops and no crust on the tip.
Intake for a canister
Drop the intake into a canister or drum — it lies on the bottom and doesn't float: three stainless M10 nuts sit inside. The solution enters through 24 filter slots 33 mm above the bottom, so sediment isn't sucked in. The tube slips onto the barb, no cable tie needed. For cleaning, the intake comes apart with a 60° twist, no tools.
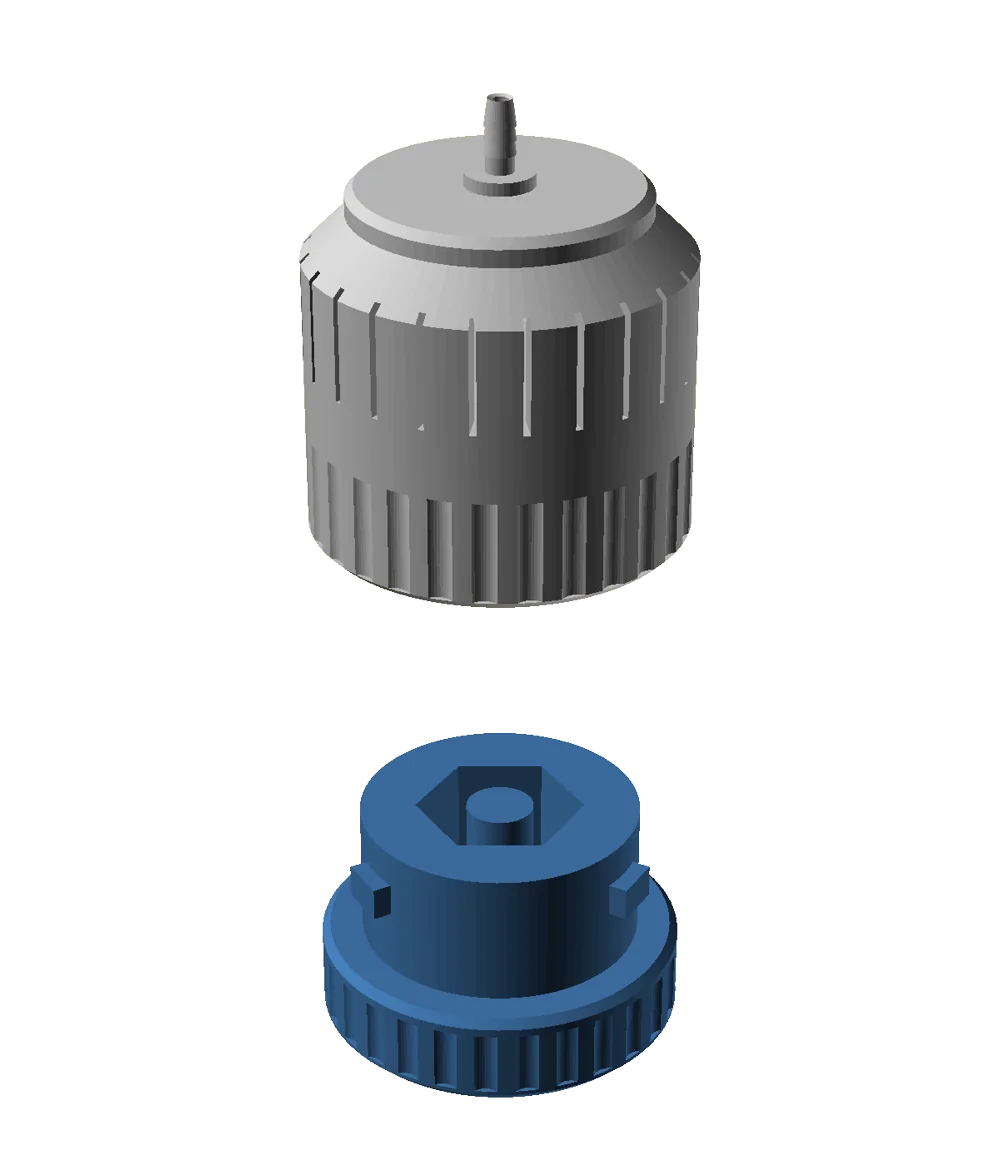
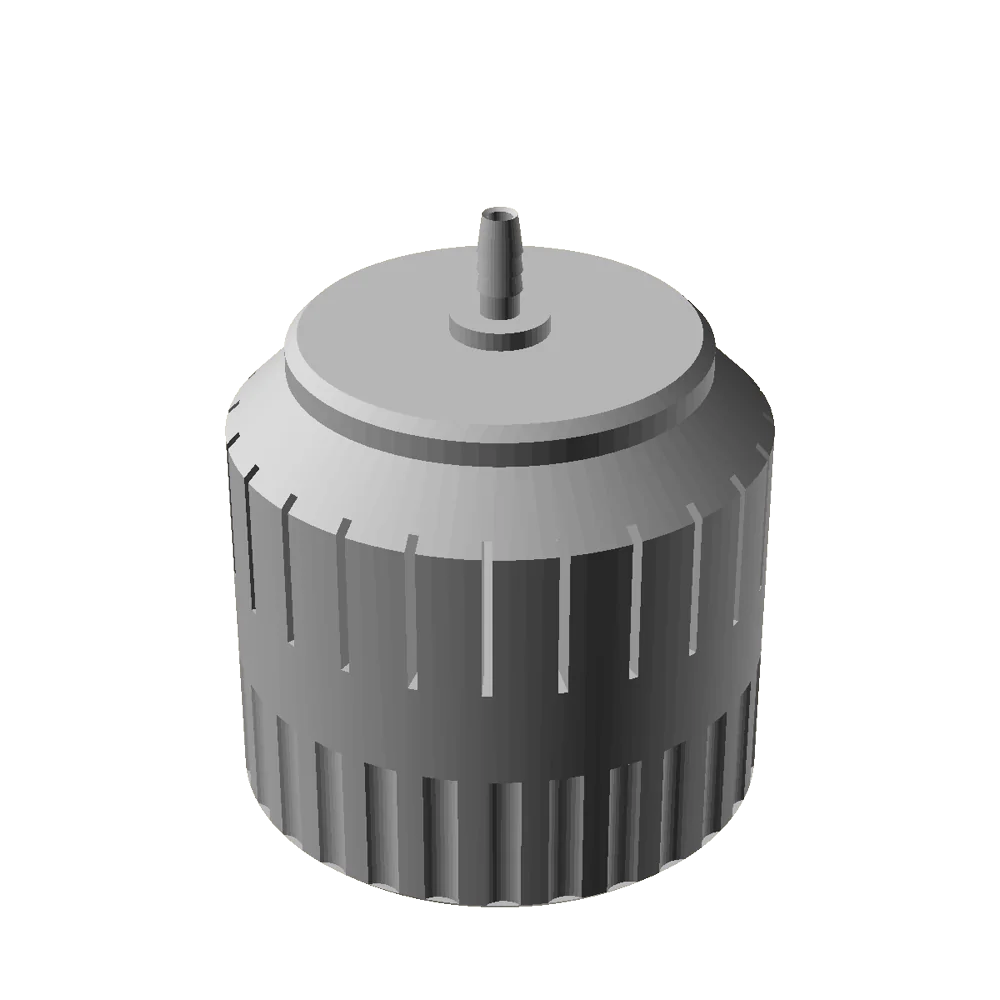
Intake assembly — 4 steps, no tools
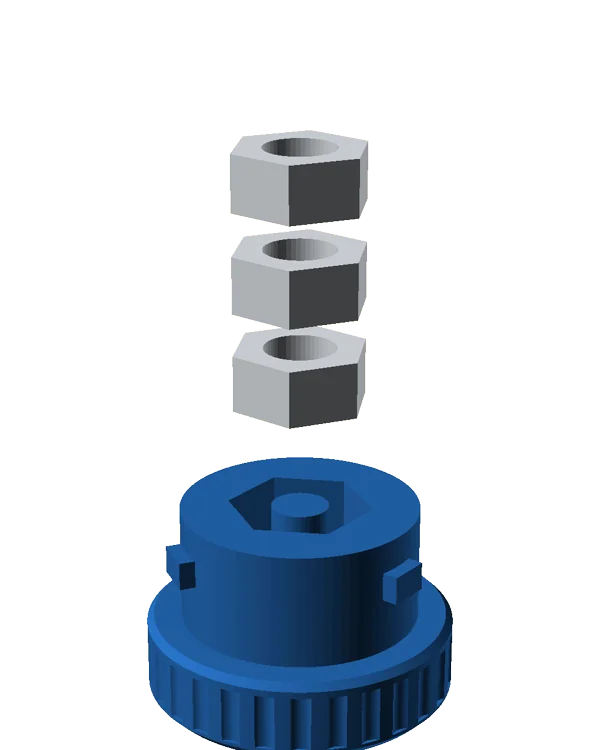
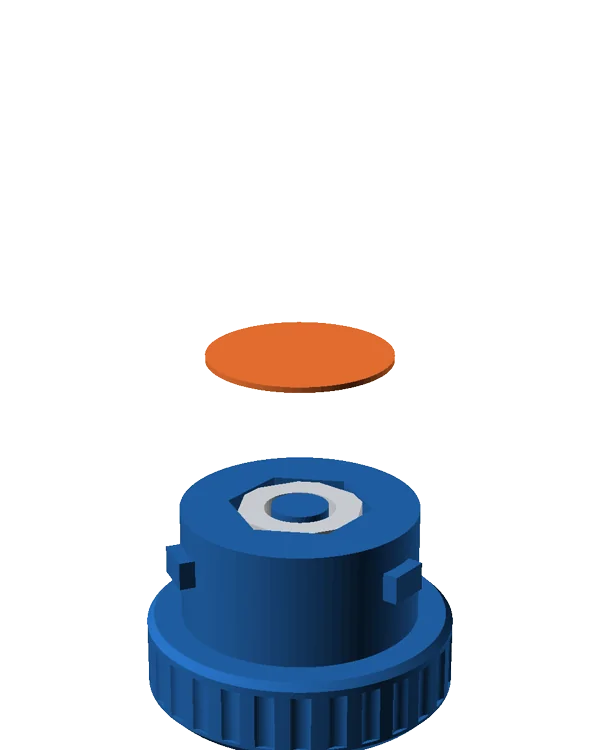
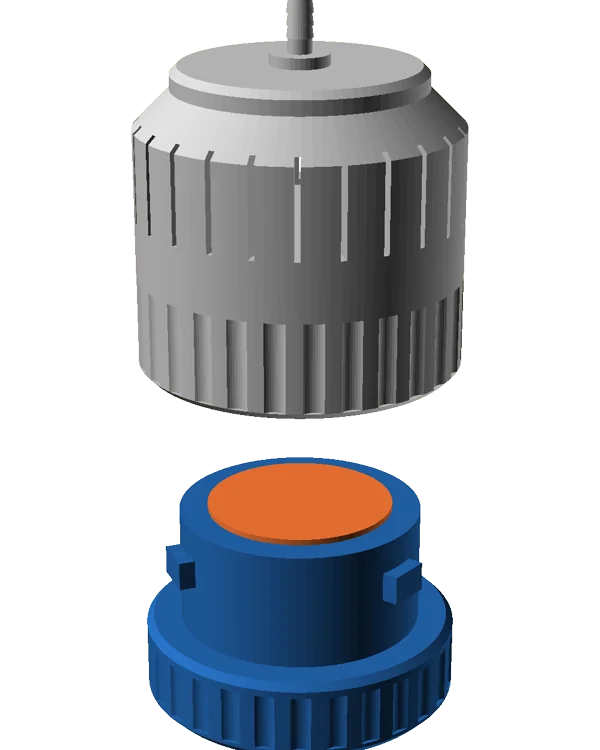
How to build the dosing pump yourself
The parts print in PETG on a regular printer with a 0.4 mm nozzle. The head takes about 47 g of filament, the case about 150 g more. The wires come with ready-made connectors, so there's almost no soldering.
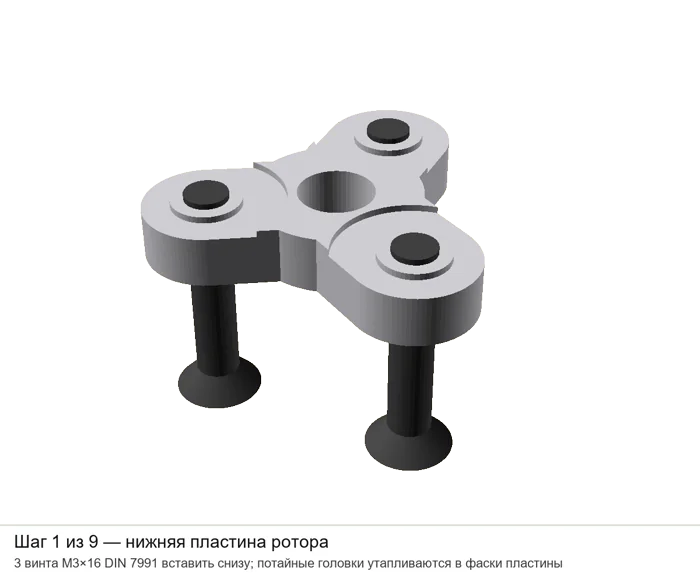
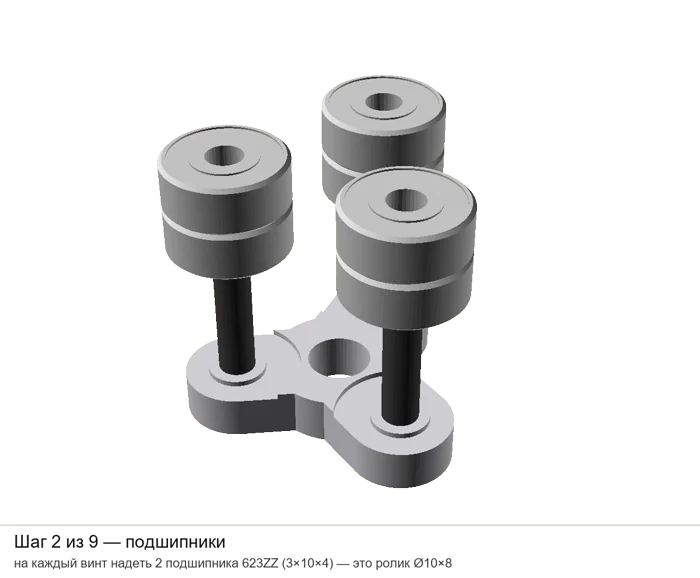
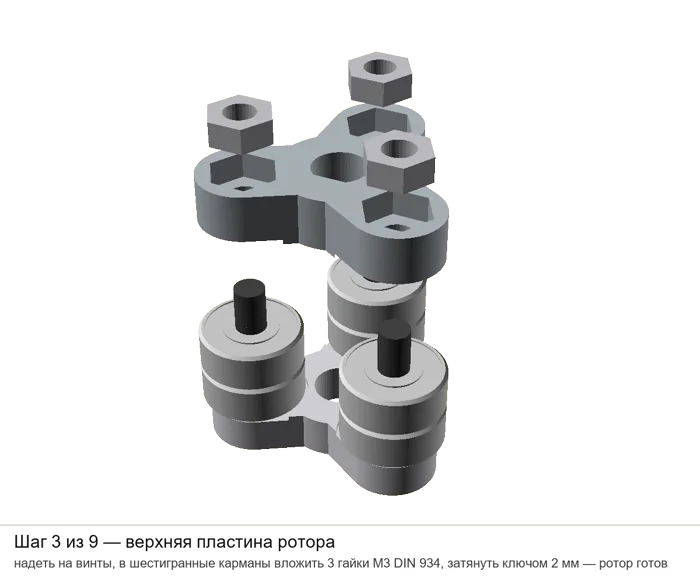
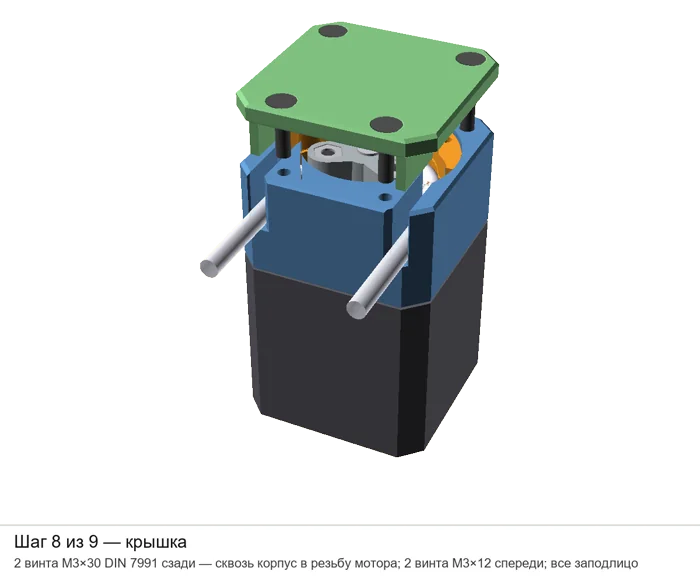
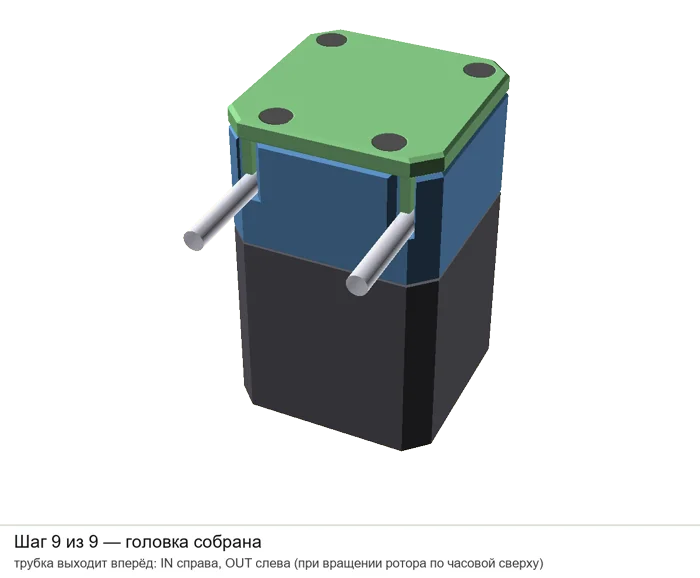
Head assembly — 9 steps
The instructions have 9 illustrated steps. Click a step to open it full size.
Dosing pump specifications
The "Status" column shows what has been tested on the rig and what is still a calculation.
| Parameter | Value | Status |
|---|---|---|
| Flow | 0.5–30 ml/min | 3.3–13.3 on the rig |
| Accuracy after calibration | ±5 % | 5-point test |
| Tube | silicone 2×4 mm; for oxidizers PharMed BPT 2×4 | working |
| Wetted parts | tube only | |
| Rotor | 3 rollers on 623 bearings, 180° wrap, reverse | |
| Outlet pressure | up to 1 bar | calculated |
| Self-priming | from 0.5 m depth | testing |
| Motor / driver | NEMA17 17HS4401 / TMC2209 | |
| Controller | ESP32-WROOM-32, Wi-Fi | |
| Power | 12 V, 2 A adapter, up to 10 W | |
| Case | 118 × 88 × 99 mm, PETG | |
| Solution temperature | up to 40 °C |
What has been tested
- design
Head model, firmware and app ready.
- build
First pump assembled.
- rework
Added tighter inserts G1.0–G1.4 for soft tubing.
- rig
Three pumps installed on the lab rig.
- now
The pumps dose coagulant and flocculant. Flow confirmed with a measuring cylinder.
- next
24-hour run, 5-point accuracy, self-priming, motor heating. I'll post the results on this page.
Tests on the lab rig
Three pumps dose reagents on a water treatment lab rig. Each pump has over 100 hours of run time. Solutions are fed from measuring beakers, flow is checked with a measuring cylinder.
| Reagent | Working solution | Flow, ml/min | Dose in water |
|---|---|---|---|
| Coagulant — technical aluminium sulfate | 12.5 g/L | 5–7.5 | 20–30 mg/L as Al₂O₃ |
| Flocculant | 0.015–0.05 g/L | 3.3–13.3 | 0.1–1.0 mg/L |
Water flow through the rig is 30 L/h. Doses change twice a day; the pump switches to the new setpoint on the fly, without stopping.
Buy the documentation
You get the files and instructions to make the pump yourself. Parts are bought separately, from the bill of materials.
VAKO-DP1 documentation
- STL models and ready print projects for Bambu Lab and QIDI
- Inserts G1.0–G1.9, a tank-wall clip and a canister intake
- ESP32 firmware with the app, plus flashing instructions
- Bill of materials with links
- Assembly instructions, wiring diagram, calibration
- Updates and answers to your questions on Telegram
Buying from outside Russia
Receiving payments from abroad is difficult in Russia right now. So for international buyers I sell only the documentation. I can't ship assembled pumps, kits or parts outside Russia.
To pay, message me on Telegram. We'll find a way that works for you.
For comparison: a ready-made lab peristaltic pump costs about $283 per channel. Parts for this pump cost about $60.
t.me/sr_kireevWhat the parts cost if you build it yourself
Estimate for one pump, Russian marketplace prices converted to USD. Exact links are in the documentation.
| Item | Qty | ≈ $ |
|---|---|---|
| NEMA17 17HS4401 motor | 1 | 9.4 |
| TMC2209 driver | 1 | 16.5 |
| Driver adapter board | 1 | 4.7 |
| ESP32 with expansion board | 1 | 7.4 |
| 12 V 2 A power supply, jack, plug | 1 | 7.8 |
| 623 bearing | 6 | 4.7 |
| Screws, nuts, heat-set inserts, feet | — | 3.5 |
| LED, wires with connectors | — | 1.3 |
| Silicone tubing 2×4 | 0.4 m | 0.7 |
| PETG | ≈200 g | 3.5 |
| Total | ≈ 60 |
Questions
What printer do I need?
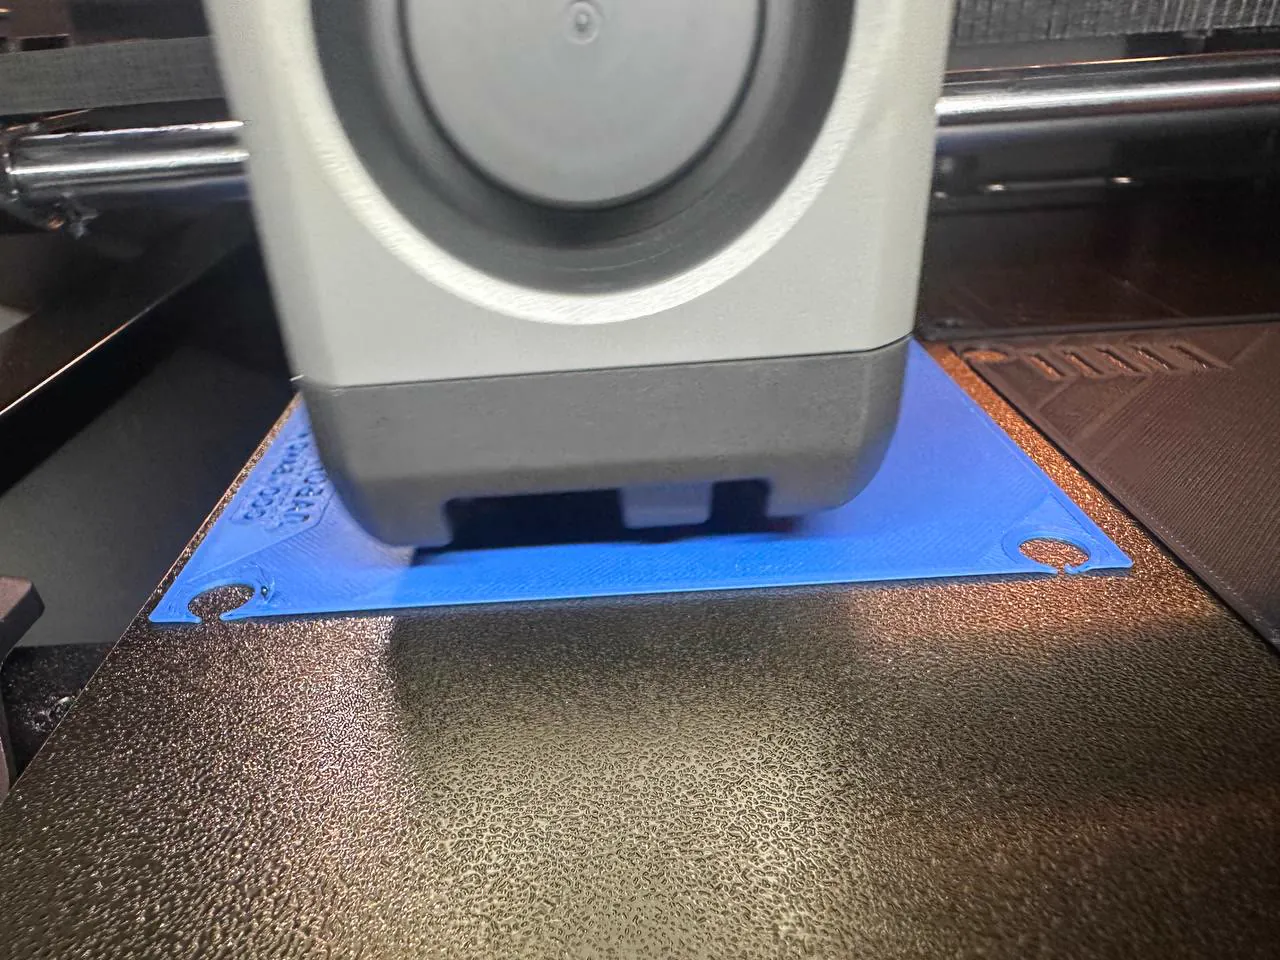
Any FDM printer with a 0.4 mm nozzle and a bed of 180×180 mm or larger. Material: PETG. The documentation has ready print projects for Bambu Lab and QIDI; for other printers you get STL files and settings.
How many channels does the pump have?
One. Each pump is a separate device with its own Wi-Fi. Need three reagents? Install three pumps. You buy the documentation once.
What solutions can it dose?
Only the tube touches the solution. Silicone tubing works for aqueous solutions of coagulants, flocculants, salts, dilute acids and alkalis. For hypochlorite and other oxidizers you need PharMed BPT tubing of the same size.
Do I need to solder or program?
No programming. You flash the firmware from a ready file by following the instructions. The wires come with connectors, so there is almost nothing to solder.
Can I build it on Arduino?
The firmware is written with the Arduino framework for ESP32 and builds in PlatformIO. A regular Arduino Uno or Nano won't work: it has no Wi-Fi, and the app runs over Wi-Fi.
How do I get the documentation?
Message me on Telegram or by email. After payment I'll send you a link to the archive and add you to the chat where updates are posted.
Do you ship outside Russia?
No. Outside Russia I sell only the documentation: the files to print and build the pump yourself.
Sergey Kireev is a water treatment process engineer at VAKO ENGINEERING. I design water treatment plants and build lab rigs for them.